Got a tip for us?
Let us know
Become a MacRumors Supporter for $50/year with no ads, ability to filter front page stories, and private forums.
DIY 5k Monitor - success :-)
- Thread starter fiatlux
- WikiPost WikiPost
- Start date
- Sort by reaction score
You are using an out of date browser. It may not display this or other websites correctly.
You should upgrade or use an alternative browser.
You should upgrade or use an alternative browser.
- Status
- The first post of this thread is a WikiPost and can be edited by anyone with the appropiate permissions. Your edits will be public.
Depending on the board you plan to use I would go for a dual TAS5782M setup, connected to the I2S (aka IIS, SPDIF, Toshlink) interface.I can't believe the price... is it any good for "our" purposes?
https://www.aliexpress.com/item/1005006686862336.html
On the R1811 board i wasn't able to find an easy way to connect it yet, however:
On the R9A18 the I2S can be found on test points. I'm not sure if it's available on stock firmware. I'm currently working on a custom one that lets us use other panels as well.
I have a few M270KCJ-K7B panels around that I plan on connecting to my R9A18 board I got for cheap used.
Note: On the R1811 we might be able to do it with running some jumper wires under the main ic, but that solution isn't ideal to say the least.
I don't have the exact board, but in my experience 12V is fine.QQ: can I power up SA1 with any voltage between 12V and 24V or it must be exactly 12V or 24V? I presume the first option but just want to be on the safe side...
The only thing I would expect to be not working is the USB-C PowerDelivery. If you don't want to charge your laptop from it you should be good to go with 12V as well.
I have another question: How can I get access to editing the first post?
@balika011 ”Registered users with at least 25 posts can both start Wiki threads and edit existing Wiki threads. If someone abuses their privileges, they will be banned from future Wiki editing.”

Next time my local electronics recycler gets a retina iMac in I am finally going to do this. I swear this time.
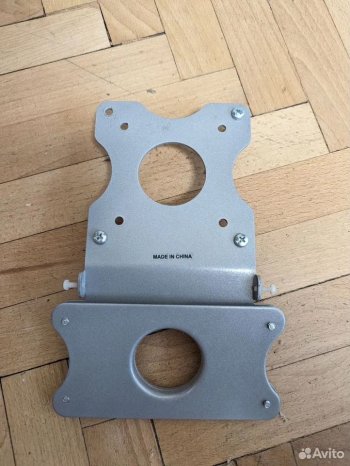
@obesechess One with an Apple VESA mount is harder to come by, but the proper adapter makes an excellent monitor.
Or an iMac Pro, for which VESA mounts are much more available, and easily swappable with the original stand. The screen panel is the same as the iMac for doing a monitor conversion.
Or an iMac Pro, for which VESA mounts are much more available, and easily swappable with the original stand. The screen panel is the same as the iMac for doing a monitor conversion.
@obesechess Here is a simple adapter that can be used on any 27" iMac (2009-2020) to easily convert it to a VESA mount. If having the foot of the existing display stand remain visible doesn't bother you, it would probably work well. I have one that I will be using to mount my display to the wall later this year - I can't speak to its performance personally, but the reviews are pretty good, it is a very simple concept, and VIVO is a decent brand name.@obesechess One with an Apple VESA mount is harder to come by, but the proper adapter makes an excellent monitor.
Or an iMac Pro, for which VESA mounts are much more available, and easily swappable with the original stand. The screen panel is the same as the iMac for doing a monitor conversion.
And if you DO mind having the foot of the existing stand visible, you could always cut it off with a saw about 1.5-2.0 inches (3.8-5.1 cm) below the stand cord hole and use this same adapter.
Last edited:
As an Amazon Associate, MacRumors earns a commission from qualifying purchases made through links in this post.
Did you power it up with 12V, 24V, or something in between?View attachment 2518335
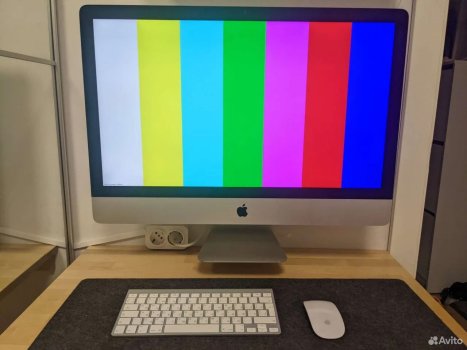
after loooong waiting for almost 3-weeks... it's alive 😁😁😁
now need to put it all togheter as version 0.1 🤣
for the very first test and trial it was 16V (v. old IBM laptop PS 16V/ 4,5A 😉) => as a long term solution it will be 24V/~150-180W
and BTW: what is the magic formula needed to calculate desired resistance of the resistor to be used in order to slow down the Apple fan depending on used voltage?
EDIT: very, very temporary 😅😅😅

and BTW: what is the magic formula needed to calculate desired resistance of the resistor to be used in order to slow down the Apple fan depending on used voltage?
EDIT: very, very temporary 😅😅😅
Last edited:
I don’t know of anyone that has used a resistor with the Apple fan. Lots have used one to slow down the small fan of the R1811 board.for the very first test and trial it was 16V (v. old IBM laptop PS 16V/ 4,5A 😉) => as a long term solution it will be 24V/~150-180W
and BTW: what is the magic formula needed to calculate desired resistance of the resistor to be used in order to slow down the Apple fan depending on used voltage?
EDIT: very, very temporary 😅😅😅
View attachment 2518677
I used a small fan PWM controller that changes the fan speed depending on temperature. It does an outstanding job for me and it never get up to a speed that makes the fan audible.
As an Amazon Associate, MacRumors earns a commission from qualifying purchases made through links in this post.
It's funny in all the Amazon pics and video of the stand they don't really show it face on....because it really looks like crap. If I wanted to use this VESA mount I would definitely hack off the "foot" high enough that it doesn't show from the front. Good find though.@obesechess Here is a simple adapter that can be used on any 27" iMac (2009-2020) to easily convert it to a VESA mount. If having the foot of the existing display stand remain visible doesn't bother you, it would probably work well. I have one that I will be using to mount my display to the wall later this year - I can't speak to its performance personally, but the reviews are pretty good, it is a very simple concept, and VIVO is a decent brand name.
And if you DO mind having the foot of the existing stand visible, you could always cut it off with a saw about 1.5-2.0 inches (3.8-5.1 cm) below the stand cord hole and use this same adapter.
As an Amazon Associate, MacRumors earns a commission from qualifying purchases made through links in this post.
There are many pics and some additional videos in the Amazon reviews that help show what it looks like. I agree it isn’t the prettiest thing on the planet. But it comes down to whether you need it to look good or just need something practical and cheap.It's funny in all the Amazon pics and video of the stand they don't really show it face on....because it really looks like crap. If I wanted to use this VESA mount I would definitely hack off the "foot" high enough that it doesn't show from the front. Good find though.
When I mount my monitor, I don’t intend to cut the foot off initially. Gonna see how bothersome it is for a week or two and then decide. Not gonna be soon though - probably not until this fall.
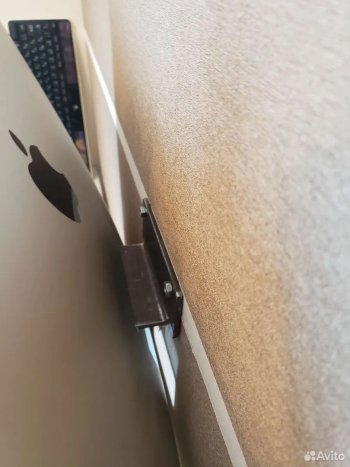
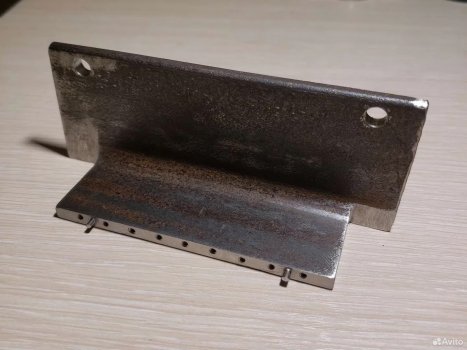
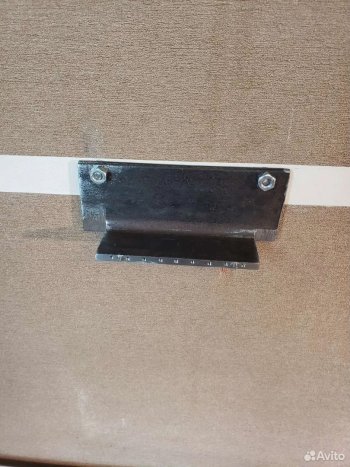
DIY mounting. Take a corner, drill holes, cut a thread.
Imac has been hanging on it for over 2 years. Before that I used a leg mount, very convenient - the leg was used as a shelf.
Imac has been hanging on it for over 2 years. Before that I used a leg mount, very convenient - the leg was used as a shelf.
Attachments
I don't understand why they don't do it out of the box. Adding a temperature probe only a few cents, it has a dozen free pwm pins and a few adc, so it should be pretty easy to implement in the software.I don’t know of anyone that has used a resistor with the Apple fan. Lots have used one to slow down the small fan of the R1811 board.
I used a small fan PWM controller that changes the fan speed depending on temperature. It does an outstanding job for me and it never get up to a speed that makes the fan audible.
note: i think the chip has no internal temperature measurement. (at least i can't find any references for it)
As an Amazon Associate, MacRumors earns a commission from qualifying purchases made through links in this post.
I'm not sure if anyone interested in running custom firmwares on R9A18, but i made some progress. I finally managed to get the firmware compiled. We have to use an old version of Keil c51 even tho the firmware I use dated 2023. It was a challenge to hunt down, c51v817a ended up working. I reverse engineered the pinshare from the firmware i extracted off the spi flash. Making the PCB config header is still in progress. Hopefully i'll soon be able to test my first build on the board.
V1 accomplished 😄
now the actual end user needs to approve the project and so I will "invest" (or not) into further development (sound, connectivity, camera, etc.)...

...but looks good to me - thank you for your support 👍

on a side note: the build is fanless and PS is external so it is rather light but removing one spring on the hinge gave appropriate tension so that the screen position is adjustable as normal
PS. looking for ENG in OSD was kind of tricky... why would you code word ENGLISH in different language 🙈
now the actual end user needs to approve the project and so I will "invest" (or not) into further development (sound, connectivity, camera, etc.)...
...but looks good to me - thank you for your support 👍
on a side note: the build is fanless and PS is external so it is rather light but removing one spring on the hinge gave appropriate tension so that the screen position is adjustable as normal
PS. looking for ENG in OSD was kind of tricky... why would you code word ENGLISH in different language 🙈
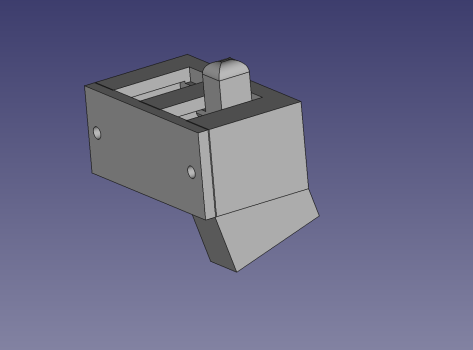
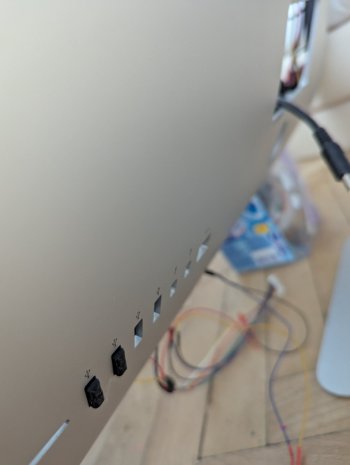
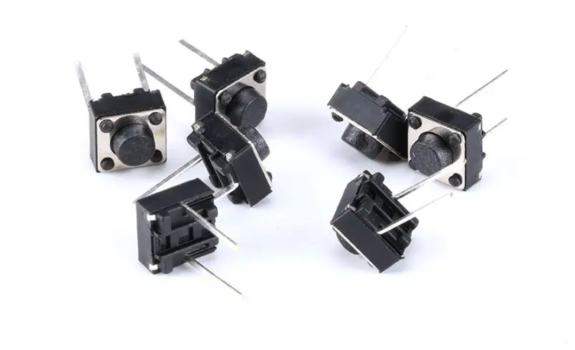
I redesigned the buttons on the back panel, made 2 in each USB hole (enter + cancel (source selection), up + down) it became much more convenient. I also connected 2 LEDs and brought them out to the bottom, they light up in the place of the logo.I redesigned the buttons on the back panel, made 2 in each USB hole (enter + cancel (source selection), up + down) it became much more convenient. I also connected 2 LEDs and brought them out to the bottom, they light up in the place of the logo. I used 6x6x5 switches.
Attachments
There are videos for few board types that shows how to switch language:PS. looking for ENG in OSD was kind of tricky... why would you code word ENGLISH in different language 🙈
I started a repo on github to collect docs and firmwares for realtek based devices here: https://github.com/balika011/realtek_display
If anyone has other versions of R1811D and R9A18 firmwares please share!
If anyone has other versions of R1811D and R9A18 firmwares please share!
Register on MacRumors! This sidebar will go away, and you'll see fewer ads.