Become a MacRumors Supporter for $50/year with no ads, ability to filter front page stories, and private forums.

PaulD-UK

macrumors 6502a
Oct 23, 2009
875
472
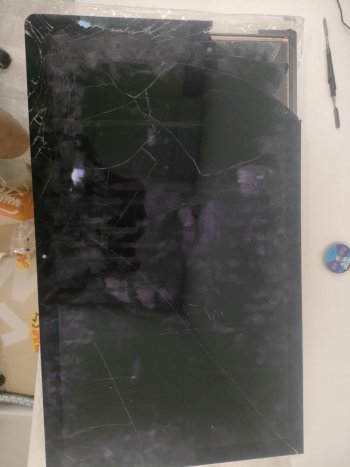
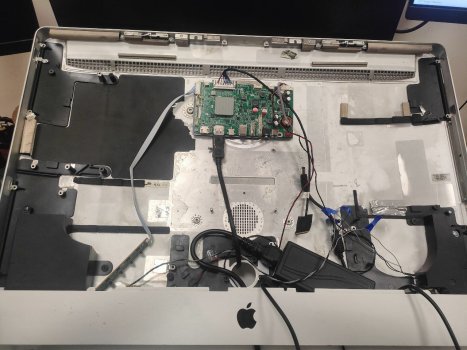
Opening an iMac is a delicate process, as the glass is very thin.
If you take it slowly and carefully it is not difficult.
The pizza-wheel tool is a help.
If someone else apart from Apple has ever opened the iMac before, and if cheap low quality thinner adhesive strips have been used, they are much more difficult to cut into.

The R1811 kit will come with the correct cables, and you will also need a USB-C (dock/Mac end) to DP 1.4 8K cable (R1811 end).

Soldering the power switch wires is straightforward with proper soldering equipment.
Also you need to solder and insulate the wires from the iMac mains socket to your PSU if you fit it inside.

Test the PSU that comes with the kit. If it gets very hot or doesn't work well then buy another PSU in Germany.
I didn't use the PSU that came with the kit, but I got a higher quality one locally.

The Control Strip can be mounted anywhere you like, where you can see the indicator LED, and the remote control can shine onto the IR receiver diode.
I mounted mine where the original USB/TB ports were, on the back of the case. The remote control works from the front by reflecting onto the IR receiver through a hole in the case.

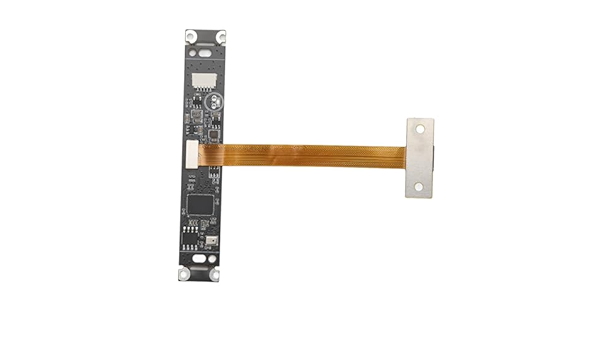
The webcam is difficult as there is very little room behind the screen.
The best description of fitting a webcam is @Aiwi in his blog.

Other people tried a cheap USB-A 720p or 1080p web camera, and the results were not good.
I use an iPhone with Continuity Camera.

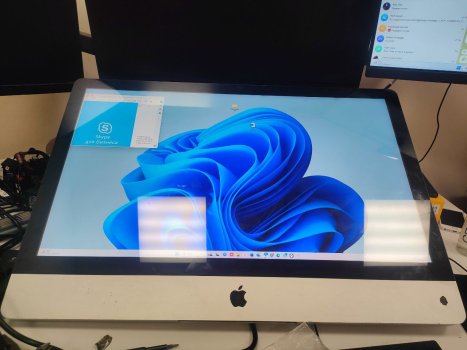
I prefer a glossy screen, but I am able to use it shaded, with no reflections on the screen.
Images look sharper and more vibrant.

@Aiwi did a lot of work on his build :) but it can be done in an easier and simpler way...
 
Last edited:
  • Like
Reactions: T-Bone90

Aiwi

macrumors member
Oct 21, 2010
94
89
I am cross posting something related, but totally unrelated to this thread!

I took an Apple LED Cinema Display and replaced its internals with that of a gaming monitor.

Now I have a 180Hz Apple-looking 1440p gaming display :)


IMG_3513 (Large).jpg


IMG_5464 (Large).jpg


IMG_5484 (Large).jpg
IMG_5465 (Large).jpg


IMG_5460 (Large).jpg

IMG_5461 (Large).jpg
 

erihp

macrumors 6502a
Apr 21, 2020
762
614
I am cross posting something related, but totally unrelated to this thread!

I took an Apple LED Cinema Display and replaced its internals with that of a gaming monitor.

Now I have a 180Hz Apple-looking 1440p gaming display :)


View attachment 2403793

View attachment 2403794

View attachment 2403796 View attachment 2403795

View attachment 2403797
View attachment 2403798
nice job on the retrofit. i particularly like the solution for the cable exit! nice work.
 

thewilewizzard

macrumors newbie
Nov 6, 2023
12
9
Comrades, greetings to all. Please tell me, are there any fundamental differences between 27-inch 5k matrices by revision? 2014-2015/2015-2021 etc. Is there somewhere I can see full information in tabular form about each of the revisions and are newer matrices really better than older ones?
 

T-Bone90

macrumors regular
Feb 8, 2018
100
25
@PaulD-UK thanks a lot. I will take a detail look at @Aiwi Post.
But I read he is use a Noctua NA-FC1 and Noctua NA-RC7. Earlier this Thread I read about a 150 Ohm Transistor to get the R1811 Fan quiet. Or maybe get the replacement Noctua Fan quiet. I don't know. What exactly transistor do I need?

@Aiwi thanks for this great and detail work! Maybe do you have a link to your 4k Webcam to buy in EU? Your posted link are only going to taobao. I found a few, sometimes FF sometimes AF. I don't know the different.
Maybe this is the right: https://de.aliexpress.com/item/1005004149480948.html ?
 

Benjinator

macrumors newbie
Jun 17, 2016
20
3
This is the pin polarity for the AA1 board:

View attachment 2403044

This is the wiring of the 12 pin plug. All the black –ve pins are the same, and red is +ve.
If the screen panel cable has grey wires as well as black then the edge red wire connects to a great wire:

View attachment 2403045

View attachment 2403053
Thank you for all of your assistance. I was able to diy the backlight cable and get power to the display! Unfortunately when I plug the edp display cable from the stonetaskin board to the display I get no video (the backlight still turns on so that cable is good). I then plugged in the old display cable to my iMac and was able to get video. This leads me to think that they either sent me a wrong cable or a defective cable…. Does anyone know if the display cable is different from the lm270qq1 that I have and the lm270qq2 that stonetaskin sent? I honestly don’t know where to go from here since this cable looks near impossible to diy. Stonetaskin also hasn’t responded to my email yet :(
 

Aiwi

macrumors member
Oct 21, 2010
94
89
@PaulD-UK thanks a lot. I will take a detail look at @Aiwi Post.
But I read he is use a Noctua NA-FC1 and Noctua NA-RC7. Earlier this Thread I read about a 150 Ohm Transistor to get the R1811 Fan quiet. Or maybe get the replacement Noctua Fan quiet. I don't know. What exactly transistor do I need?

@Aiwi thanks for this great and detail work! Maybe do you have a link to your 4k Webcam to buy in EU? Your posted link are only going to taobao. I found a few, sometimes FF sometimes AF. I don't know the different.
Maybe this is the right: https://de.aliexpress.com/item/1005004149480948.html ?
I don’t have any EU link, but I think you should be able to find it on AliExpress.

FF means fixed focus, AF means auto focus. I think you should choose auto focus, so that you’ll be in focus regardless how near or far you are from the camera.

Also, you want a resistor not a transistor :)

Here’s how I did it:

1723092225455.png
 
Last edited:
  • Like
Reactions: T-Bone90

thewilewizzard

macrumors newbie
Nov 6, 2023
12
9
I warn you that I'm doing this for the second time without any screen capture skills, you just need to be careful and attentive to the little things
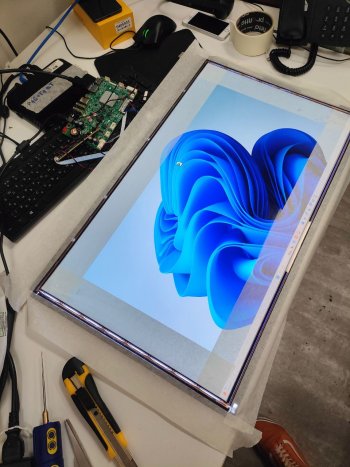
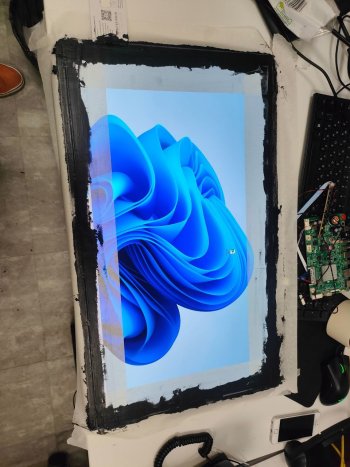
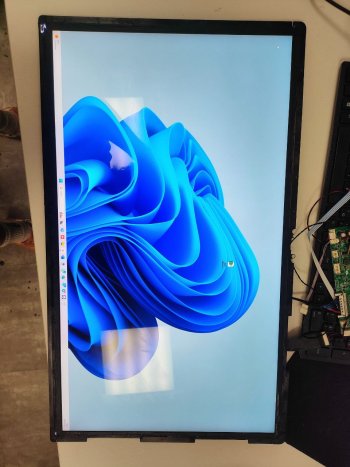
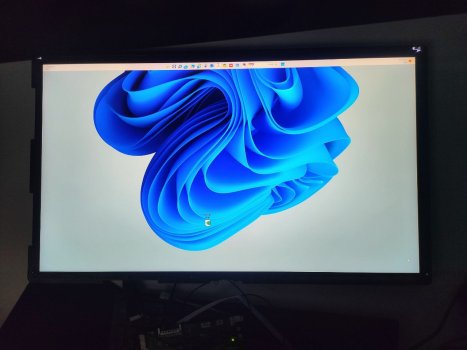
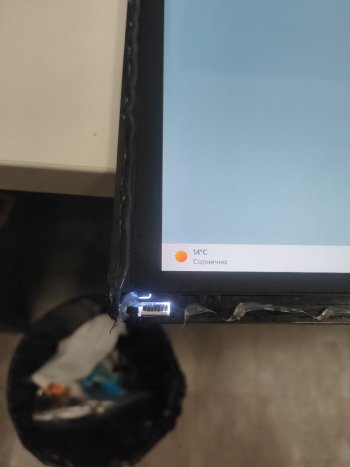
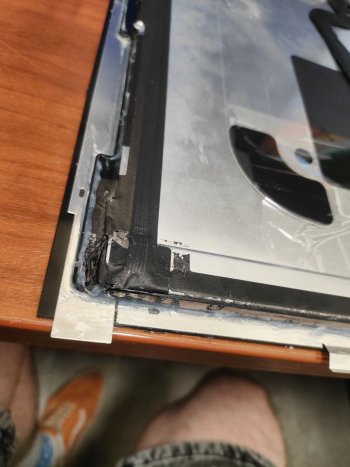
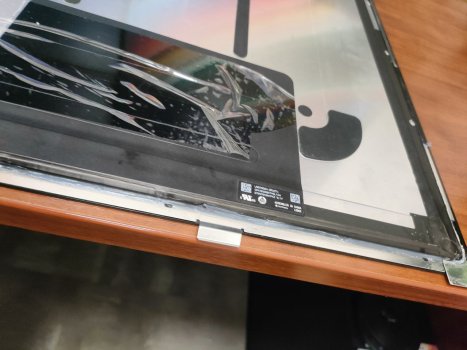
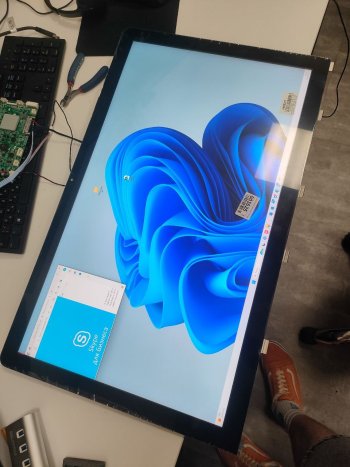
Comrades, greetings. I want to share the full instructions for remaking the imac lm270qq1 bit matrix and crossing it with glass from the imac 2010-2011, so that you can put its case in the corresponding years. I'm sorry for the translation, I'm from Russia.
What we need:
a. a broken 2014-2019 imac matrix. In my case, it is lm270qq1 (sd)(c1).
b. Controller, in my case it is the cheapest "JRY-W9CUHD-AA1"
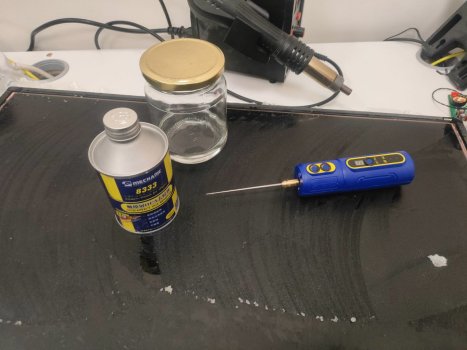
c. Fishing line for removing matrices with a size of 0.10
d. OCA glue remover from mechanic or similar
e. OCA remover from mechanic or isopropyl alcohol (works almost the same way)
f. The 2010-2011 imac case in which glass is supposed to be mounted on magnets
g. The glass itself for the imac case
k. 2 types of sealant, neutral (black) and sanitary (transparent). (Neutral, as a rule, holds surfaces weakly and crumbles in hands, and sanitary adheres very well, stretches and holds glued surfaces).
j. A heat gun or soldering station
Let's get to work)))
Step one.
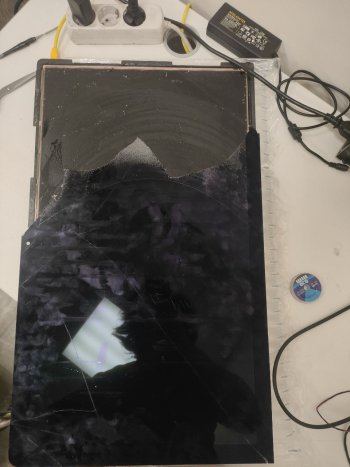
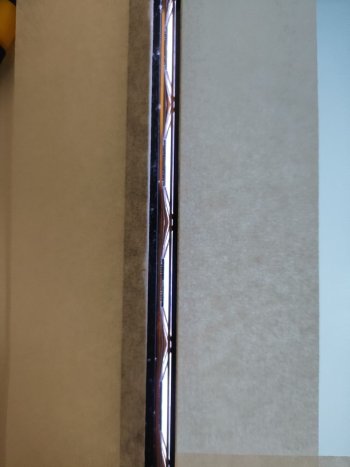
It is necessary to carefully heat the matrix with a heat gun so that the glue becomes more stretchy and bring the 0.10 mm fishing line into one of the corners of the matrix, at this stage it is very important not to damage the polarizing filter and make sure that the fishing line is exactly under the glass. Then, according to the same principle, we start it from the opposite edge, center it and cut the glass already on the plane
Step two.
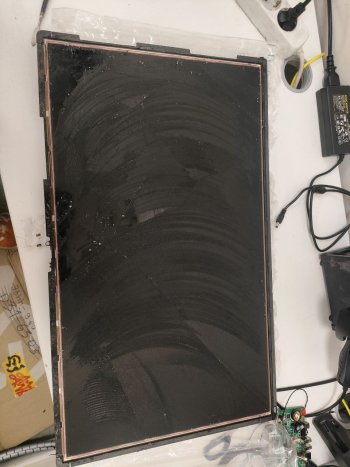
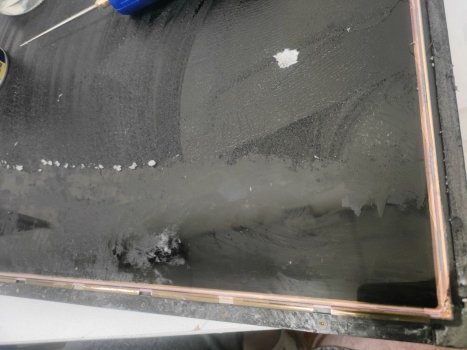
Armed with a machine for removing oca glue, it is necessary to clean off most of it, and then wipe off the remnants with isopropyl alcohol or a special rinse. If there is no typewriter at hand, then it is necessary to remove the glue with cotton pads soaked with a special rinse or isopropyl alcohol (a very long and tedious task)
Step three.
At this stage, we need to darken the luminous halos from the backlight, otherwise they will be visible after gluing the glass, which is very striking. To do this, we mark with masking tape the places where the insulating layer will be applied (the perimeter of the matrix itself and part of the side plastic guides) and after that we close the highlights with a black neutral sealant and a plastic card spatula
Step four.
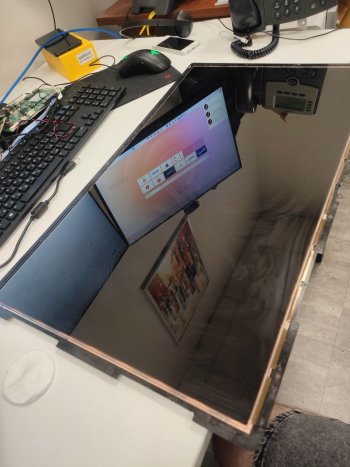
We apply a sanitary transparent sealant to the plastic frames, center the glass along the side frames of the matrix and glue it by pressing on the edges so that the excess sealant comes out. Next, when the sealant grabs a little, after about 10 minutes, turn it over with the glass down and leave it for a day
Step five.
Here it is already necessary to mark the board in the case as you like, I attached it to the racks for the meter board, pulling them with nuts on the back side. Aesthetics don't bother me much, the case has also been marked and drilled for installation on a vesa mount.
Step six.
After the sealant dries, it is necessary to insert the finished matrix into the grooves and snap it (places may differ in different versions of the housing, so you may have to file the upper part of the plastic at the matrix attachment, in my case it was so.
It cost a little more than 20,000 rubles, which is equal to $ 232 at today's exchange rate.
Good luck to everyone, I hope my experience will be useful to someone
 

Attachments

  • photo_2024-07-25_19-12-19.jpg
    photo_2024-07-25_19-12-19.jpg
    108.3 KB · Views: 44
  • photo_2024-07-25_19-12-19 (2).jpg
    photo_2024-07-25_19-12-19 (2).jpg
    150 KB · Views: 33
  • photo_2024-08-08_11-25-22.jpg
    photo_2024-08-08_11-25-22.jpg
    133.7 KB · Views: 38
  • photo_2024-08-08_11-25-24.jpg
    photo_2024-08-08_11-25-24.jpg
    172.9 KB · Views: 37
  • photo_2024-08-08_11-25-20.jpg
    photo_2024-08-08_11-25-20.jpg
    149.7 KB · Views: 38
  • photo_2024-08-08_11-25-21.jpg
    photo_2024-08-08_11-25-21.jpg
    169.6 KB · Views: 43
  • photo_2024-08-08_11-25-21 (2).jpg
    photo_2024-08-08_11-25-21 (2).jpg
    158.7 KB · Views: 41
  • photo_2024-08-08_11-25-21 (4).jpg
    photo_2024-08-08_11-25-21 (4).jpg
    89.5 KB · Views: 49
  • photo_2024-08-05_14-44-51.jpg
    photo_2024-08-05_14-44-51.jpg
    201.2 KB · Views: 38
  • photo_2024-08-05_14-44-51 (2).jpg
    photo_2024-08-05_14-44-51 (2).jpg
    184.3 KB · Views: 40
  • photo_2024-08-08_11-25-24 (2).jpg
    photo_2024-08-08_11-25-24 (2).jpg
    150.7 KB · Views: 42
  • photo_2024-08-08_11-25-22 (2).jpg
    photo_2024-08-08_11-25-22 (2).jpg
    106.8 KB · Views: 41
  • photo_2024-08-06_19-23-28.jpg
    photo_2024-08-06_19-23-28.jpg
    64.6 KB · Views: 37
  • photo_2024-08-06_19-23-29.jpg
    photo_2024-08-06_19-23-29.jpg
    149.7 KB · Views: 47
  • photo_2024-08-08_11-25-27.jpg
    photo_2024-08-08_11-25-27.jpg
    149.6 KB · Views: 40
  • photo_2024-08-08_11-25-25.jpg
    photo_2024-08-08_11-25-25.jpg
    157 KB · Views: 45
  • photo_2024-08-08_11-25-22 (3).jpg
    photo_2024-08-08_11-25-22 (3).jpg
    200.2 KB · Views: 57
  • photo_2024-08-07_13-49-37.jpg
    photo_2024-08-07_13-49-37.jpg
    125 KB · Views: 54
  • Like
Reactions: davidg5678

T-Bone90

macrumors regular
Feb 8, 2018
100
25
I don’t have any EU link, but I think you should be able to find it on AliExpress.

FF means fixed focus, AF means auto focus. I think you should choose auto focus, so that you’ll be in focus regardless how near or far you are from the camera.
Thanks a lot! I will check this again.
If I read correctly, you modified the plastic mount of the old Facetime camera, right? Did you also sand down something on the camera itself? Have you taken any detailed photos of it or can you say anything more about it?
Also, you want a resistor not a transistor :)

Here’s how I did it:

View attachment 2403893
A great, thanks!
So if I try to keep the original fan from the R1811 board, I only need a 150 Ohm resistor? Which one is best to use? Or does it make sense to replace the original fan with the Noctua NF-A4x10 PWM? But the question still remains, which 150 Ohm resistor to use? Because a resistor I need in any case right? I would like it to be whisper quiet. :cool:

I don't plan on installing the iMac fan. That's why I only need the left side of you great sketch.
 
Last edited:

baggiero

macrumors member
Jun 12, 2024
31
18
A T19 update now I'm back from hols and decided to at least get it together w. 24V but no audio ...
I'll need to get on my other Mac to add the build photos but below is the output from Betterdisplay info about the connection (TB to DP cable from M2 MacBook Air) - ie. 10Bit RGB over DP which is good!. Colour is maybe a bit blue/cold - I'll try adjusting the colour temperature using the (highly annoying) Control Strip buttons..

A couple of possibly-useful bits and bobs.
T19 with no fans is definitely running rather hotter than I'd like (inc. on 24V psu) - the front of the screen is not too hot to touch but it's fairly toasty.
I haven't solved my audio issues, though.
The iMac PSU had quite a pronounced buzz under (normal) load - detectable even with the screen back in place, but not unbearable.
MOLEX connectors (to avoid soldering) are actually not that hard to buy, once you've figured out what to ask for.
The 12V output from the iMac PSU is a Molex, Micro-Fit 3.0 Male Connector Housing, 3mm Pitch, 12 Way, 2 Row (for which you then need the matching male connector wires (your choice of plating, length, insulation colour)). 18AWG wire is in theory good to 8A so you can, I think, get away with a single pair for + and - to a board at 12V.
The 230V input to the iMac PSU is a Micro-Fit 3.0 Male Connector Housing, 3mm Pitch, 3 Way, 1 Row (ar-ess online dot com works for me ..) (same wires required). The square hole is the Neutral. (The 12-way I bought for 12V supply actually can be bodged to hook up the 230V supply to a 24V PSU).
RS also have 8A-rated 2.5/5.5mm plugs though they're a bugger to solder.
Cat5/6 wires fit perfectly in the sockets of the plug terminating the iMac power button cable! - so I soldered those onto the contacts of the power button the control strip (drilled 1mm holes through the board right next to the end pair of button contacts and poked the cables through so they're stable and easier to solder. Given it's low voltage I just taped the connection up.
The 8K TB to DP cable fits well through the old ethernet port hole in the casing - I filed off the internal shoulders and burrs and cut down a household wall socket backbox grommet to protect it rather tidily.

With reuse of the 230V supply, power switch and the grommeted TB/DP exit, the hatch is closed unless I should need to access the strip buttons or the HDMI 2.1 extension (not validated what Mac -> HDMI is capable of as I don't have a 5K-over-HDMI-capable Mac ...)

Screenshot 2024-08-08 at 11.20.16.png
 
  • Like
Reactions: PaulD-UK

PaulD-UK

macrumors 6502a
Oct 23, 2009
875
472
Quote: @thewilewizzard "Please tell me, are there any fundamental differences between 27-inch 5k matrices by revision? "

There have been eight different LG 5K iMac screen panels used by Apple:

Late 2014 - LM270QQ1 SD(A1), (A2), (A3). Max brightness 440 nits.
"The 2014 displays are notorious for developing image retention. They do not burn-in, but can develop similar symptoms. However afaik, it will sort it itself out, if left without power over a longer period."

Late 2015 - LM270QQ1 SD(B1) Display P3 500 nits.
"The 2015 displays are liable to getting pink edges as they get older, and may allow dust in around the edges if the iMac has got too hot." Link. Posts #18, #21.

Late 2017 - LM270QQ1 SD(C1) P3 500 nits.

Late 2017 iMac Pro - LM270QQ1 SD(D1) P3 500 nits.

Mid 2019 - LM270QQ1 SD(E1) P3 500 nits.
Both 2019/20panels have a backlight cable slightly different from earlier panels.

2020 - LM270QQ1 SD(F1) P3 500 nits.
Plain or Nano glass. Inbuilt screen webcam.
 
  • Like
Reactions: kevinherring

PaulD-UK

macrumors 6502a
Oct 23, 2009
875
472
@T-Bone90 "Maybe do you have a link to your 4k Webcam to buy in EU?"

The search keyword it Sony IMX258.
I can't find that on Amazon.de, and there are probably cheaper sellers on AliExpress.
EDIT. Like this, select the AF12K tab:

For the heatsink fan, people earlier in the thread say a Noctua fan is not much quietter than the original fan, so I kept the original fan.
But it needs slowing down, with a 150 ohm resistor, 2 watt rating will do.
This link sells 30! You only need 1.

The proper Noctua part is NA-RC12, but it may only be available bought with a fan.
 
Last edited:

baggiero

macrumors member
Jun 12, 2024
31
18
Internals pre-screen (temporary) reattachment.
The 24V PSU is attached only in one corner to one of the existing mounting studs but is very solid (and picks up a good earth via it as the original 230V earth is still attached to one of the other studs and the PSU casing is connected to the supply E terminal. I guess there's still potential for 50Hz RF from the (pretty short) 230V fly-leads to the psu. I might think about putting some foil tape around them with a flying earth to it if I experience W-Fi or bluetooth effects.
The audio problem is most peculiar - in particular the effect on video playback of having the audio output set to the card. -it makes the playhead skip around very weirdly as well as very intermittently giving snippets of the sound output.


IMG_3391.JPG
 
  • Like
Reactions: PaulD-UK

PaulD-UK

macrumors 6502a
Oct 23, 2009
875
472
@Benjinator StoneTaskin sell replacement eDP cables for the R1811, but I don't think that fits a JRY board.
Have you tried contacting them on their website? They replied promptly to me both by email and on their webpage.
 

T-Bone90

macrumors regular
Feb 8, 2018
100
25
The search keyword it Sony IMX258.
Ahh perfect thanks a lot!
For the heatsink fan, people earlier in the thread say a Noctua fan is not much quietter than the original fan, so I kept the original fan.
But it needs slowing down, with a 150 ohm resistor, 2 watt rating will do.
This link sells 30! You only need 1.

The proper Noctua part is NA-RC12, but it may only be available bought with a fan.
OK I will take a look. So if I find the NA-RC12, can I also use it directly? Because it has 3 pins and the standard fan as it looks only 2 pins.
Otherwise, would I simply have to solder the resistor to the red plus cable? Sorry for the stupid questions, but I've never soldered anything like that.
 

PaulD-UK

macrumors 6502a
Oct 23, 2009
875
472
Yes. The RC12 has Red, Black and Yellow wires. Just ignore the yellow.
Red and black are the same as the R1811 fan wires, the resistor goes in the red wire.
 
  • Like
Reactions: T-Bone90

baggiero

macrumors member
Jun 12, 2024
31
18
I am cross posting something related, but totally unrelated to this thread!

I took an Apple LED Cinema Display and replaced its internals with that of a gaming monitor.

Now I have a 180Hz Apple-looking 1440p gaming display :)


View attachment 2403797
Those look like the flat-ribbon ADT DP and HDMI extenders you've used there? Have you tested any 5K60 input to them (in your 5K build, that is)?
 

Aiwi

macrumors member
Oct 21, 2010
94
89
Those look like the flat-ribbon ADT DP and HDMI extenders you've used there? Have you tested any 5K60 input to them (in your 5K build, that is)?
It is! I have not tested them with a 5K monitor. But in order to obtain 1440p180Hz we need DisplayPort 1.4 speeds.

In my specific scenario, I could not get a high enough speed when using a 5m DP cable connected in series with the ADP DP cable (40cm). I could only obtain 165Hz (DP 1.2 speeds)

I bought a DP signal repeater which cleans up the signal and placed it after the 5m cable. Then a 2m DP cable connects to the ADP cable, which in turn is connected to the driver board. This works really well.

So: PC -> DP cable (5m) -> DP Repeater -> DP cable (2m) -> internal ADP cable -> driver board

 
  • Like
Reactions: baggiero

usert888

macrumors newbie
Aug 8, 2024
18
25
I have success with installing an R1811 board in my iMac 5K Late 2014 (with VESA mount). Some highlights:

  • Cables via the power cable hole
  • Button panel in the VESA mount
  • Connected the power button of the iMac
  • IR receiver in place of the webcam
My 3D designs and instructions for this build can be found at: https://www.printables.com/model/968024-diy-imac-late-2014-5k-monitor-kit-for-r1811-driver

Pretty happy how it turned out. Also added two YLY-2088 crossovers, the sound is better than anticipated, maybe even on par with how it originally was. I designed mounts for the crossover boards which can be found at the link above.

IMG_8923.jpeg
IMG_8914.jpeg
 

PaulD-UK

macrumors 6502a
Oct 23, 2009
875
472
Nice build! I especially like putting the Control Strip in the VESA mount.

My analysis of the crossover units shows the way you have them set is you are bypassing the inductor coils by have jumper B set.
So you are in fact connecting the larger speaker directly to the loudspeaker.
This will mean the impedance load on the R1811 amplifier chip will be lower than the spec of 3.2 ohms minimum at frequencies above about 8KHz.

I don't think this matters much, but you could see if your R1811's CSC3110 amp chip (next to socket) gets excessively hot when playing loud high frequency sounds before you seal the case up. ;)

I can't see how your speaker plug that connects to the R1811 is wired, but the correct speaker wire order is L+L–R–R+ from top to bottom. If you have silk screen markings on the back of the board they may wrong, with the R connections reversed.

Edit: Does the IR signal from the remote penetrate through the screen glass OK?
 
Last edited:

usert888

macrumors newbie
Aug 8, 2024
18
25
Nice build! I especially like putting the Control Strip in the VESA mount.

My analysis of the crossover units shows the way you have them set is you are bypassing the inductor coils by have jumper B set.
So you are in fact connecting the larger speaker directly to the loudspeaker.
This will mean the impedance load on the R1811 amplifier chip will be lower than the spec of 3.2 ohms minimum at frequencies above about 8KHz.

I don't think this matters much, but you could see if your R1811's CSC3110 amp chip (next to socket) gets excessively hot when playing loud high frequency sounds before you seal the case up. ;)

I can't see how your speaker plug that connects to the R1811 is wired, but the correct speaker wire order is L+L–R–R+ from top to bottom. If you have silk screen markings on the back of the board they may wrong, with the R connections reversed.

Edit: Does the IR signal from the remote penetrate through the screen glass OK?
Thank you for the feedback.

I had no idea what the jumpers did, so I used the default settings. I read you analysis but my knowledge is too limited to fully understand. The sound is really amazing so I will check if the amp chip gets too hot, if so, what should I do?

Regarding the wires, I have indeed connected the wires L+L–R–R+ on the board. I attached the wrong picture the message I see now (one before connecting the cable).

The IR signal works perfectly, the circle around the camera is clear glass (and the IR filter is probably in the camera lens itself).
 

T-Bone90

macrumors regular
Feb 8, 2018
100
25
Does anybody know a VESA mount for the iMac 2017, which is not necessarily from Apple and is so extremely expensive? You can hardly find anything there somehow.

I designed mounts for the crossover boards which can be found at the link above.
Looks amazing. Thank you for providing the 3D prints!

Why did you attach the board to the display and not in the aluminum case? Is there a reason for that?

For example, do the templates also fit in the aluminum case? I'm not sure where to mount something yet, but most of them have probably mounted it in the case.
 
Last edited:
  • Like
Reactions: usert888

PaulD-UK

macrumors 6502a
Oct 23, 2009
875
472
Quote: @usert888 "if the amp chip gets too hot, if so, what should I do?"

If you remove jumper B then the inductance will be in circuit, and cut down high frequencies, and return the speaker impedance to 4 ohms at all frequencies, which is how it should be. ;)
However the sound may not sound quite as good - I don't know.
 
  • Like
Reactions: usert888

PaulD-UK

macrumors 6502a
Oct 23, 2009
875
472
Quote: @T-Bone90 "anybody know a VESA mount for the iMac 2017."

All the non-Apple VESA mounts for iMac 27" 2012-2019 are not the same as the correct Apple one.
The older ones for 2011 mount horizontally, so the space faces sideways, rather than upwards.
The easiest to find are for the iMac Pro, but you have to fabricate a complex bracket as the iMac Pro hinge is different.
Everything is expensive...

The OP in this thread used a pre-2011 VESA mount. He used the hinge from a 2011 iMac 27".
These old VESA mounts are much cheaper.
 
  • Like
Reactions: T-Bone90
Register on MacRumors! This sidebar will go away, and you'll see fewer ads.