Become a MacRumors Supporter for $50/year with no ads, ability to filter front page stories, and private forums.
Status
The first post of this thread is a WikiPost and can be edited by anyone with the appropiate permissions. Your edits will be public.
It doesn´t work. Unrebootable system.
This happened to me too. Try this:
1- Boot from usb dosdude
2- (re)apply patches
3- reboot and boot again from usb dosdude
4- click the red x to close the window, you will be asked from which disk you want to startup, choose your macos disk.

The above steps worked for me.

PS: I don't know why but after finishing patching, the system rebooted and I pressed the option key to choose from which disk to startup: choosing the efi disk or the mac os disk did not work and there was a boot loop; only the above steps worked.
 
Last edited:
  • Like
Reactions: TimothyR734

Attachments

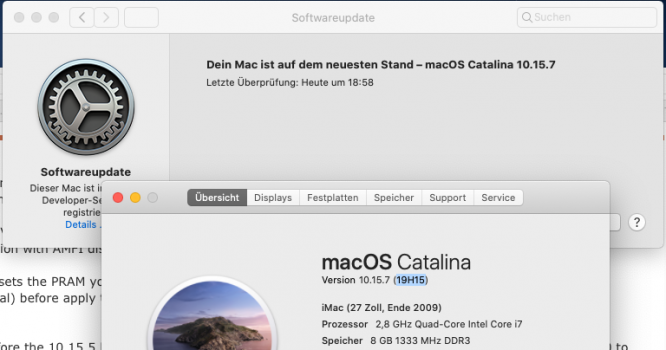
  • 19H15.png
    19H15.png
    137 KB · Views: 132
I can confirm place the CatalinaAutoMount in /Library/LaunchDaemons folder then reboot . Then running swupatch.sh in the terminal downloaded the security update then once it was nearly finished downloading ran the catalinaswufix4amfix patch in the terminal. Then proceeded to install the update after the first reboot I selected my OpenCoreApFSloader3 usb choose macOS Install then once the install was complete boot into the Catalina Patcher 1.4.4 and applied the post install patches
 

Attachments

  • CatalinaAutoMountWritable.plist.zip
    1.1 KB · Views: 170
  • swupatch.sh.zip
    1.4 KB · Views: 118
  • catalinaswufix4amfi.command.zip
    1.8 KB · Views: 130
Never failed with updates and it worked with 19H15.

I tried this on a new installation of 19H2 and when I click on either button I get "no such file or directory". I don't know where to add the directory or switch to the proper one. Someone have an idea please?
 
  • Like
Reactions: TimothyR734
when I click on either button I get "no such file or directory". I don't know where to add the directory or switch to the proper one.
mmm..sorry but I don't know what you are talking about...yuo run the fixer app, read the instruction, you click the first button on the left which enable the developer updates, you download the update from the software update panel and when you are downloading and you reach about 1-2% of the update you click the second button on the fixer app.
You don't need to create any directory..
 
  • Like
Reactions: TimothyR734
mmm..sorry but I don't know what you are talking about...yuo run the fixer app, read the instruction, you click the first button on the left which enable the developer updates, you download the update from the software update panel and when you are downloading and you reach about 1-2% of the update you click the second button on the fixer app.
You don't need to create any directory..
When I ran the CatalinaOTAswufix from the Applications folder, I got a message that a swupdate folder did not exist. When I moved the CatalinaOTAswufix to the desktop and ran it, it worked.

Now the problem is that I can run the update but it starts for a few minutes, than stops, reboots the computer and it's still on 19H2.
 
  • Like
Reactions: TimothyR734
When I ran the CatalinaOTAswufix from the Applications folder, I got a message that a swupdate folder did not exist. When I moved the CatalinaOTAswufix to the desktop and ran it, it worked.

Now the problem is that I can run the update but it starts for a few minutes, than stops, reboots the computer and it's still on 19H2.

I had this, too. When the update is loaded in System Preferences/Software Update and is ready to be installed, try to adapt it with the catalinaswufix4amfi.command linked by @TimothyR734 in post #12,703. Then start the installation. Be patient, the installation should work after this. At the end you also have to apply the post install patches, of course. Good luck!
 
  • Like
Reactions: TimothyR734
I had this, too. When the update is loaded in System Preferences/Software Update and is ready to be installed, try to adapt it with the catalinaswufix4amfi.command linked in post #12,703. Then start the installation. Be patient, the installation should work after this. At the end you also have to apply the post install patches, of course. Good luck!

I've tried it multiple times and it starts update - black screen, white progress bar about a 10th of the way, restarts to a grey screen, sits there for a minute or 2, APFS boot comes up and it's back to the currently installed Catalina version. There has got to be something missing here.
 
This happened to me too. Try this:
1- Boot from usb dosdude
2- (re)apply patches
3- reboot and boot again from usb dosdude
4- click the red x to close the window, you will be asked from which disk you want to startup, choose your macos disk.

The above steps worked for me.

PS: I don't know why but after finishing patching, the system rebooted and I pressed the option key to choose from which disk to startup: choosing the efi disk or the mac os disk did not work and there was a boot loop; only the above steps worked.
Thanks. Didn´t work. I´ll just wait till a full installer is released.
 
  • Like
Reactions: TimothyR734
When I ran the CatalinaOTAswufix from the Applications folder, I got a message that a swupdate folder did not exist. When I moved the CatalinaOTAswufix to the desktop and ran it, it worked.

Now the problem is that I can run the update but it starts for a few minutes, than stops, reboots the computer and it's still on 19H2.
The CatlianaOTAswufix can be run in the terminal with atleast minimum 10% of the Security update downloaded I usual wait until atleast 95% complete
 
  • Like
Reactions: macinfo
For those who used CatalinaOTAswufix (it requires "csrutil disable") during the OTA update downloading, you should relaunch the app and apply the "OTA update fix", if you already did that and still reboot to previous Catalina version, then means you are using a non-APFS Mac, so you should use USBOpenCoreAPFSloader3 to continue the hidden stage2 "macOS Installer", then after update completes reapply dosdude1 post install patches, you can even continue booting through USBopencore .
 
Windows community already found the solution:

“Despite what Adobe is saying officially, Photoshop 2021 does NOT require support of SSE4.2 to run.
The real problem is that:
- IPP libraries optimized for SSE3 are missing from distribution (they are available from Intel)
- OpenCV library was build with SSE4.2 requirement
To fix this download this pack of libs from any source below (it's the same):
https://www113.zippyshare.com/v/cqtznzt2/file.html
https://www.sendspace.com/file/vh0wjm
Unpack archive and copy libs to Photoshop 2021 installation directory (overwrite opencv_world440.dll when requested).

This fixes the problem and PS runs just fine.
But disclaimer as usual – all this at your own risk.

Please note that this is not a hack or something like this – this is official libraries from official sources.
Intel IPP libraries was taken from Intel Parallels Studio XE 2020.1.0 and contains valid signature from Intel.
OpenCV library was taken from official release of OpenCV 4.4.0 on GitHUB (https://github.com/opencv/opencv, build by VC15)”.

Is there any chance for us? Please, help!
unzip the attached file and use it to replace the file in Photoshop 2021 here : /Applications/Adobe\ Photoshop\ 2021/Adobe\ Photoshop\ 2021.app/Contents/Frameworks/libopencv_world.4.4.0.dylib
 
unzip the attached file and use it to replace the file in Photoshop 2021 here : /Applications/Adobe\ Photoshop\ 2021/Adobe\ Photoshop\ 2021.app/Contents/Frameworks/libopencv_world.4.4.0.dylib
The fix for MACOS can be downloaded from here:

https://www.sendspace.com/file/meab5g


Unzip the file and copy the resulting libopencv_world.4.4.0.dylib file to replace the same file in the Photoshop 2021 installation directory (/Applications/Adobe\ Photoshop\ 2021/Adobe\ Photoshop\ 2021.app/Contents/Frameworks/libopencv_world.4.4.0.dylib).


This fixes the problem an PS runs just fine.
But disclaimer as usual - all this at your own risk.


OpenCV library was taken from official release of OpenCV 4.4.0 on GitHUB (https://github.com/opencv/opencv)
 
I looked in the directory /usr/local and couldn't find any opt/ file with the lib missing named in he error log. We are in the right direction for a fix but a dylib is still missing..............or maybe I done something wrong when replacing the libpopencv in the Frameworks of the app ??
 
  • Like
Reactions: TimothyR734
I looked in the directory /usr/local and couldn't find any opt/ file with the lib missing named in he error log. We are in the right direction for a fix but a dylib is still missing..............or maybe I done something wrong when replacing the libpopencv in the Frameworks of the app ??
I tried this replacement but Shop still not opening with this error log . Looks some other dylib missing ???? Or an unresolved alias missing ????View attachment 1537060
Exactly the same
 
  • Like
Reactions: TimothyR734
I can confirm place the CatalinaAutoMount in /Library/LaunchDaemons folder then reboot . Then running swupatch.sh in the terminal downloaded the security update then once it was nearly finished downloading ran the catalinaswufix4amfix patch in the terminal. Then proceeded to install the update after the first reboot I selected my OpenCoreApFSloader3 usb choose macOS Install then once the install was complete boot into the Catalina Patcher 1.4.4 and applied the post install patches
Where do I download the update?
 

Attachments

  • libopenjp2.2.7.dylib.zip
    117.3 KB · Views: 109
  • Like
Reactions: TimothyR734
try this file and put it in photoshop install directory or in /usr/local/opt/openjpeg/lib/ folder
alternatively, you could download the file from here: https://www.sendspace.com/file/p2i2le
Thanks for this folder I downloaded but I suppose I have to use Terminal to create the opt/openjpeg/lib/dylib folder downloaded. I am not an expert with using Terminal so I need help on which sudo command I need to use for this creation ?????? Thanks in advance for this help.......
 
Thanks for this folder I downloaded but I suppose I have to use Terminal to create the opt/openjpeg/lib/dylib folder downloaded. I am not an expert with using Terminal so I need help on which sudo command I need to use for this creation ?????? Thanks in advance for this help.......
you do the following steps in Terminal:
sudo mkdir -p /usr/local/opt/openjpeg/lib/
mv libopenjp2.7.dylib /usr/local/opt/openjpeg/lib/
 
Question.. When I install Catalina from the DD Patcher, if I have Catalina set as the boot volume and I press CMD-R to get into recovery mode, it never works. I have to have Mojave set as the boot volume and the CMD-R works.

Any idea why?
 
  • Like
Reactions: K two
Register on MacRumors! This sidebar will go away, and you'll see fewer ads.