I might try something like this again as part of my experimentation/testing.To fix AirDrop for Ivy Bridge Mac with a Broadcom 802.11n "Wifi 4" card simply use the stock Mojave IO80211Family.kext that contains mainly the required AirPortBrcm4360.kext (plugin) , moreover it also contains the driver for legacy Broadcom Wifi cards.
Got a tip for us?
Let us know
Become a MacRumors Supporter for $50/year with no ads, ability to filter front page stories, and private forums.
macOS 11 Big Sur on Unsupported Macs Thread
- Thread starter dosdude1
- WikiPost WikiPost
- Start date
-
- Tags
- 10.16 macos unsupported
- Sort by reaction score
You are using an out of date browser. It may not display this or other websites correctly.
You should upgrade or use an alternative browser.
You should upgrade or use an alternative browser.
- Status
- The first post of this thread is a WikiPost and can be edited by anyone with the appropiate permissions. Your edits will be public.
For the boot-args, you can simply boot the "EFI Boot" that v0.2.0 adds to the installer USB -- that will do it nearly instantly (and shut the Mac off immediately after doing it).Using @jackluke opencore 4.2, I upgraded my MBP 9.2 mid 2012 to B8, the only trouble I encountered was adding to NVRAM the boot-args="-no_compat_check" parameter 'cause opencore delete it, to solve, I hit CMD+r to get into Internet Recovery and from its terminal add NVRAM parameter that was missing to boot without the opencore USB, after that I used a USB with B6 patched with @Barry K. Nathan v0.2.0 patch to get the WiFi working again.
Can you give link to @jackluke opencore 4.2?Using @jackluke opencore 4.2, I upgraded my MBP 9.2 mid 2012 to B8, the only trouble I encountered was adding to NVRAM the boot-args="-no_compat_check" parameter 'cause opencore delete it, to solve, I hit CMD+r to get into Internet Recovery and from its terminal add NVRAM parameter that was missing to boot without the opencore USB, after that I used a USB with B6 patched with @Barry K. Nathan v0.2.0 patch to get the WiFi working again.
Can you give link to @jackluke opencore 4.2?
https://github.com/jacklukem/USBOpenCoreAPFSloader/releases/tag/4.2
currently to build correctly the USBopencore your target USB flash drive label should not contain empty spaces, if you use other bootloader example rEFInd , to correctly spoof the machine you need to boot opencore before rEFInd, simply hold alt-option key after power-on from apple startup manager.
From opencore you can use the typical apple shortcut keys, example CMD+V or CMD+S just press once before selecting the bootable volume, moreover you can boot the unhidden "Recovery 11.0" (this takes till 5 minutes to boot on a blank screen) from where for example you can delete snapshots to use "sudo mount -uw /" from normal booting.
Also but this is an opencore "issue", after exiting from opencore both csrutil and nvram are cleared, so you should set them again if you intend to boot a patched system without opencore.
Last edited:
Download the 10gb zip using the link given by @ASentientBot but iit contains files like assests, not the full beta 8 installer. Is there a way to create the install package from it or is there the usual link to download it? Thank you!
[Edit] OK, I have read the @ASentientBot previous tutorial and understood that there is no beta 8 full available, yet @Vital L
[Edit] OK, I have read the @ASentientBot previous tutorial and understood that there is no beta 8 full available, yet
Last edited:
Big Sur Micropatcher v0.2.0 is finally out. Here are the release notes. (I might update the release notes on GitHub later if I forgot anything.)
So let me know if you find any typos or mistakes in the README, and let me know how things go.
As I've mentioned before, I know about the AirDrop problems and about WiFi patch problems more generally. I'll try to improve that situation in a future release. Maybe not v0.2.1, but hopefully not too long after.

GitHub - barrykn/big-sur-micropatcher: A primitive USB patcher for installing macOS Big Sur on unsupported Macs
A primitive USB patcher for installing macOS Big Sur on unsupported Macs - barrykn/big-sur-micropatchergithub.com
Work in MacBook Pro mid 2009??, Core2Duo??
Thanks for your work!!!
EDIT:
Instructions for use:
1. to 8. = ALL OK
9. (Optional if you have already done this step using micropatcher v0.2.0 or later) Restart the Mac while holding down the Option key to use the Startup Selector. The installer USB will actually show up as two different drives with the same icon, "Install macOS Big Sur Beta" (or similar) and "EFI Boot". (If you have multiple "EFI Boot" drives and cannot tell which one is the one on the installer USB, try unplugging the installer USB, observing the set of icons on the screen, then plugging the installer USB back in and watching how the icons change.) Start up from "EFI Boot". Within a few seconds, although most likely in under a second, the Mac will suddenly power down. This indicates that the setvars EFI utility has finished making the necessary changes to the Mac's NVRAM settings. (These changes include disabling SIP, disabling authenticated root, and enabling TRIM on non-Apple SSDs.) = OK
10.Turn the Mac back on (or reboot it if you skipped step 9), with the Option key down again, to use the Startup Selector again. This time, boot from "Install macOS Big Sur Beta" (or similar). = Prohibited signal in a grey screen
Last edited:
I can't create the USBopencore flash drive. It fails with failing to mount /dev/diskXs3. What gives?https://github.com/jacklukem/USBOpenCoreAPFSloader/releases/tag/4.2
currently to build correctly the USBopencore your target USB flash drive label should not contain empty spaces, if you use other bootloader example rEFInd , to correctly spoof the machine you need to boot opencore before rEFInd, simply hold alt-option key after power-on from apple startup manager.
From opencore you can use the typical apple shortcut keys, example CMD+V or CMD+S just press once before selecting the bootable volume, moreover you can boot the unhidden "Recovery 11.0" (this takes till 5 minutes to boot on a blank screen) from where for example you can delete snapshots to use "sudo mount -uw /" from normal booting.
Also but this is an opencore "issue", after exiting from opencore both csrutil and nvram are cleared, so you should set them again if you intend to boot a patched system without opencore.
I can't create the USBopencore flash drive. It fails with failing to mount /dev/diskXs3. What gives?
You should set
csrutil disable before making the drive, also if you have Catalina or Mojave try make from there, but at least SIP needs to be disabled.If you already have SIP disabled, then try to rename the USB flash drive label for example as "USBopencore", if still doesn't work, try to erase the USB flash drive manually from DiskUtility with GUID GPT scheme, then assign to it a label without spaces.
That model will not work with the micropatcher at this point. It's possible that I will eventually fix the problems -- but problems that affect all users, and problems that affect users of 2012 and newer Macs, are higher priorities. Also, even if I get it working, graphics will be unaccelerated, and it will be really sluggish. To be honest, don't get your hopes up.Work in MacBook Pro mid 2009??, Core2Duo??
Thanks for your work!!!
EDIT:
Instructions for use:
1. to 8. = ALL OK
9. (Optional if you have already done this step using micropatcher v0.2.0 or later) Restart the Mac while holding down the Option key to use the Startup Selector. The installer USB will actually show up as two different drives with the same icon, "Install macOS Big Sur Beta" (or similar) and "EFI Boot". (If you have multiple "EFI Boot" drives and cannot tell which one is the one on the installer USB, try unplugging the installer USB, observing the set of icons on the screen, then plugging the installer USB back in and watching how the icons change.) Start up from "EFI Boot". Within a few seconds, although most likely in under a second, the Mac will suddenly power down. This indicates that the setvars EFI utility has finished making the necessary changes to the Mac's NVRAM settings. (These changes include disabling SIP, disabling authenticated root, and enabling TRIM on non-Apple SSDs.) = OK
10.Turn the Mac back on (or reboot it if you skipped step 9), with the Option key down again, to use the Startup Selector again. This time, boot from "Install macOS Big Sur Beta" (or similar). = Prohibited signal in a grey screen
So, the good news is that I convinced DP7 to boot on a Core 2 Duo.
View attachment 957261
The bad news is that I did it by swapping in the DP6 kernel, and it wouldn't even reach single-user mode without that.
I did multiple swaps and KC rebuilds to confirm this. So it's clear that the kernel is the culprit.
- Every DP7 kext + the DP6 kernel = boots
- Every DP6 kext + the DP7 kernel = hangs
Whatever Apple's changed in the kernel completely breaks it on (presumably) Penryn systems. This is... not good.
For Penryn Core2Duo same applies to beta 8 (and to its BaseSystem.dmg Recovery) , otherwise stuck on ACMKernelService (AppleCredentialManager.kext) at early booting, and it's not a kernel panic where could get some logs but just a kernel freeze, harder to figure out, downgrading to beta 6 kernel should work at least for now but this I guess should be applied also to a next full installer app because the staged installer uses an updated kernel too.
Attachments
That model will not work with the micropatcher at this point. It's possible that I will eventually fix the problems -- but problems that affect all users, and problems that affect users of 2012 and newer Macs, are higher priorities. Also, even if I get it working, graphics will be unaccelerated, and it will be really sluggish. To be honest, don't get your hopes up.
Thanks for all!!
has someone ever found a way to Patch AppleACPICPU.kext to get Big Sur to work on 15" & 17" mid 2010 macbook Pros?
I had to use micro patcher 0.0.19 to enable handoff and airport on the same model.please help me start Handoff and airport on this machine
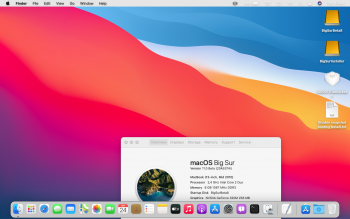
View attachment 957960
View attachment 957961
So, my MacBook Pro 5,5 mid 2009 is dead for install Big Sur ? 😌That model will not work with the micropatcher at this point. It's possible that I will eventually fix the problems -- but problems that affect all users, and problems that affect users of 2012 and newer Macs, are higher priorities. Also, even if I get it working, graphics will be unaccelerated, and it will be really sluggish. To be honest, don't get your hopes up.
I have actually Catalina 10.15.6 work fine!!!
Thx Barry
Big Sur Micropatcher v0.2.0 is finally out. Here are the release notes. (I might update the release notes on GitHub later if I forgot anything.)
So let me know if you find any typos or mistakes in the README, and let me know how things go.
As I've mentioned before, I know about the AirDrop problems and about WiFi patch problems more generally. I'll try to improve that situation in a future release. Maybe not v0.2.1, but hopefully not too long after.

GitHub - barrykn/big-sur-micropatcher: A primitive USB patcher for installing macOS Big Sur on unsupported Macs
A primitive USB patcher for installing macOS Big Sur on unsupported Macs - barrykn/big-sur-micropatchergithub.com
Could you expand on step 13?
Start the Installer as you would on a supported Mac. (If you see "BIErrorDomain Error 2" -- specifically 2 and not any other number -- that is an insufficient disk space error, and you need to free up disk space, or erase the volume and do a fresh installation.)
I am getting this error on my Early 2013 15" MBP and created a 200GB APFS formatted partition on my Flash Storage for this.
Use this linkplease help me start Handoff and airport on this machine
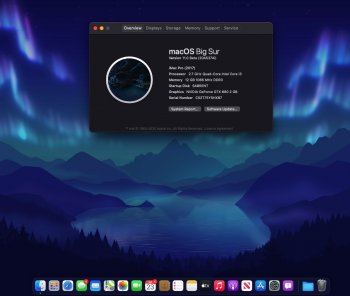
View attachment 957960
View attachment 957961
It works 100% even for older versions
GitHub - barrykn/big-sur-micropatcher: A primitive USB patcher for installing macOS Big Sur on unsupported Macs
A primitive USB patcher for installing macOS Big Sur on unsupported Macs - barrykn/big-sur-micropatcher
beta 8 via opencore on a 4.1/5.1 no bootloops, no wifi
everything else all ok
Using an iMac Pro config
everything else all ok
Using an iMac Pro config
Attachments
Last edited:
I might try something like this again as part of my experimentation/testing.
Instead for Broadcom 802.11ac (also some Ivy Bridge have the "Wifi 5") you should use the stock BigSur IO80211Family.kext
@Barry K. Nathan, on a late 2013 iMac are you using the native Big Sur Wifi ktext or a patched one?
Model Name: iMac
Model Identifier: iMac14,3
Processor Name: Quad-Core Intel Core i7
Hey Barry. Firstly, thanks for the huge amount of work you've obviously put into this. You must have the patience of a saint to deal with all the oddball questions and trouble-shooting that people ask for too.Big Sur Micropatcher v0.2.0 is finally out. Here are the release notes. (I might update the release notes on GitHub later if I forgot anything.)
So let me know if you find any typos or mistakes in the README, and let me know how things go.
As I've mentioned before, I know about the AirDrop problems and about WiFi patch problems more generally. I'll try to improve that situation in a future release. Maybe not v0.2.1, but hopefully not too long after.

GitHub - barrykn/big-sur-micropatcher: A primitive USB patcher for installing macOS Big Sur on unsupported Macs
A primitive USB patcher for installing macOS Big Sur on unsupported Macs - barrykn/big-sur-micropatchergithub.com
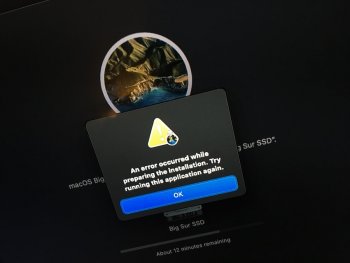
After a few failed attempts (error is in pic below), this worked fine for me, even wifi.
Target Mac is a late 2012 Mac Mini (2.3gHz i7, 16GB RAM, brand new 500GB Samsung 860 EVO).
I had written a message about how it wasn't working for me, but then got to be suspicious that the Big Sur installer I was using might have been the very first dev beta. Did it all over from scratch with a freshly downloaded public beta, and patched a totally different USB stick, and all worked like a charm. Your README is a masterpiece.
Another thing I tried was installing to a volume, rather than a partition, thinking that might have been the prob. Successful install was to a volume (although install to a volume had also failed previously). Do you think there's any appreciable difference in success rates installing to either?
Attachments
Out of curiosity, is it necessary to update to DP7 or 8 after all? DP8 build number is 20A5374i, previous build is 20A5374g if I am not mistaken. Doesn't look like major changes in between. My MBP 2012 13" system runs 20A5364e just fine, without major issues apart from dodgy Wifi behaviour now and then. It might makes sense just to wait for the final release from now on in this case.
Sort of on point regarding beta 7 and 8, I’d reinstalled beta 6 using the Hax3 method from Catalina (not with USB stick) and had it running fine as an unsealed system. I usually always delete snapshots as well but the OTAswufix requires that the OS is booted from a snapshot, so I left the initial ‘update’ one in place.
After booting with OpenCore 0.61, the delta beta 7 (3.61GB) showed up, downloaded and failed to install (as reported by many) but then initiated a full download (11.52GB - also reported). While all of this was happening in real time, I searched where these files were being placed. The S/Volumes/Update had a folder ‘softwareupdate.xxx(x).xxxxxx’ (3 or 4 + 6 characters) generated but the files were not where the delta files were installed. A ‘source’ alias inside this folder pointed to the ‘AssetData’ folder inside the S/L/AssetsV2/com_apple_MobileAsset_MacSoftwareUpdate_MacUpdateBrain/xxx...xxx.asset/ folder. (xxx...xxx = 40 characters)
The BigSur OTA updates process is as you described, some clarification:
from beta 6 to perform the small OTA update 3,61 GB (2,94 GB from beta 7) I guess not only a snapshot booting but also a sealed system is required, or maybe unsealed but with a stock apple snapshot after beta 6 installation that means some Ivy Bridge should not install a patched Wifi kext but use ethernet to OTA update, otherwise the 11,51 GB OTA full packages is delivered, anyway both the updates take almost the same time to install during the "Preparing macOS Big Sur beta 8" phase.
The softwareupdate.xxx(x).xxxxxx is a mount point here /System/Volumes/Update/mnt1/
all the files and payloads are inside "source" alias that points to /System/Library/AssetsV2/...
I guess this AssestsV2 path is a non snapshot system temporary mounted on another mount point.
Anyway after the "Preparing macOS Big Sur beta 8", all the weird bom payload packages are copied to /System/Volumes/BigSurLabel/macOS Install Data/ that is tagged as bootable "macOS Installer" after reboot.
In my case also for a 3,61 GB update are required at least 30 GB of free available space, because seems that during the "Preparing macOS Big Sur beta 8" the snapshot mounted takes temporary the exact amount of "System volume" space (not the Data volume) and also the 3,61 GB unpackaged size is around 10 GB , because apple use their zlib high level of compression.
Spoofing through opencore should allow an OTA update, but the condition to complete are mainly a valid snapshot booting (possibly stock without kext patches), a sealed system (maybe unsealed could work too at least for the OTA full package).
In any case, better to wait for a full installer createinstallmedia app.
Last edited:
I... don't understand what this means. Do you mean installing to an APFS container that has just one volume vs an APFS container that has multiple volumes?Another thing I tried was installing to a volume, rather than a partition, thinking that might have been the prob. Successful install was to a volume (although install to a volume had also failed previously). Do you think there's any appreciable difference in success rates installing to either?
In any case, I'd say the main factors regarding success (in my experience) are:
- Do you have enough free disk space (I think 50GB should generally be enough; maybe you can get away with less)?
- Is the USB stick fully working? (I might be able to make a small program that does some kind of test that would find not all, but many failed installer USB sticks.)
- Is the rest of the hardware working? (I had one installation failure when testing micropatcher v0.2.0, but it turned out to be a failing SSD. This is a different SSD than the one that failed for me back in July or August. This year I've had a lot of hard drive and SSD failures, but most of the hard drives are from 2011 and all of the SSDs are from 2014, so I think it's basically a matter of old hardware finally dying.)
I think I addressed this somewhere in step 15 in the README. On that model of iMac, don't run patch-kexts.sh, just use Big Sur's own WiFi kext.@Barry K. Nathan, on a late 2013 iMac are you using the native Big Sur Wifi ktext or a patched one?
Model Name: iMac
Model Identifier: iMac14,3
Processor Name: Quad-Core Intel Core i7
Register on MacRumors! This sidebar will go away, and you'll see fewer ads.


