Become a MacRumors Supporter for $50/year with no ads, ability to filter front page stories, and private forums.
Status
The first post of this thread is a WikiPost and can be edited by anyone with the appropiate permissions. Your edits will be public.
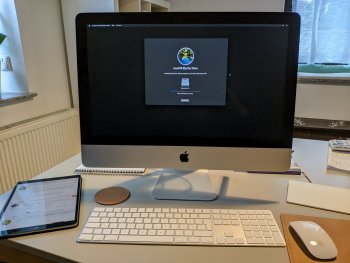
I have the same problem with @jackluke patches to boot a core2duo system - The install stitch boots ready, but then gray image with mouse pointer iMac 9,1.
I can move the mouse, but nothing happens.

I just tested the BaseSystem Legacy USB fix beta 9 for beta10 BaseSystem.dmg and it still worked correctly, are you sure that you made properly the stock beta10 Installer with createinstallmedia ?

Check the output of this (copy paste):
Code:
ls /Volumes/Install*/*.app ; ls -l /Volumes/Install*/*.app/C*/MacOS/* ; ls -l /Volumes/Install*/*.app/C*/SharedSupport/

You should have: an "Install macOS Big Sur Beta.app" , three InstallAssistant* exec (compiled by apple on 10 October) and a "SharedSupport.dmg".

Otherwise you don't used a stock createinstallmedia BigSur Installer.
 
Last edited:
Installing Beta 10 on an iMac 13,1 - Late 2012.
Big Sur beta 9 had previously been installed successfully on an external USB HDD, including the WiFi patch.
Beta 10 installed on the same HDD using micropatcher from barrykn's GitHub webpage. After installation, the iMac was booted into Big Sur, without WiFi. As explained in step 13 of Barry's procedure, patch-kexts.sh was then run in Terminal under Big Sur and completed without error. Next step should then be to restart Big Sur with working WiFi. However, the system was no longer bootable and several attempts only produced a kp.
Any ideas?
I'm going to re-run the entire installation process, but that takes nearly 3 hours from memory stick to external HDD.
It would be really helpful if you (all) capture the output of the patch-kext.sh call, write it to file, possibly using Textedit, post it in addition to the result. It is impossible to analyze a final “it does not work” message.
 
  • Like
Reactions: TimothyR734
For a reason or an other, Apple didn't put the files of the Recovery Mode in other languages than in English. I told this in a previous post, because I couldn't boot in recovery mode with my MBP, which is supported, after the beta 10 update. But only in French (or in a foreign language), in English everything was OK. I think that's the reason of that grey screen, just after that "Choose Language" appears briefly. What I simply did, is to change the main language of my computer in English (in System Preferences). And, indeed, everything is running fine! After, you simply has to change your main language back in yours! I think it's an easy workaround... And thank you Apple for this beautiful bug!!
 
Last edited:
For a reason or an other, Apple didn't put the files of the Recovery Mode in other languages than in English. I told that in a previous post, because I couldn't boot in recovery mode with my MBP which is supported. But only in French (or in a foreign language), not in English. I think that's the reason of that grey screen, just after the "Choose Language" that appears briefly. What I simply did, is to change the main language of my computer in English (in System Preferences). And, indeed, everything is running fine! After, you simply change your main language back in yours! I think it's an easy workaround... And thank you Apple for this beautiful bug!!

This is the way, installing now on late 2012.

Thanks!
 

Attachments

  • IMG_20201016_165509.jpg
    IMG_20201016_165509.jpg
    326.5 KB · Views: 959
Last edited:
just installed big sur over my existing system/partition using barry's micropatcher. everything went without problem, everything works, my system is intact. late 2013 27 imac
big thanks for the work you've done
 
Ok, thanks for the update. I’ll wait until there’s an update then.
Refers to my earlier post #5151.
Reinstalled Big Sur from the memory stick "Install macOS Big Sur Beta" to the iMac 13,1. Big Sur started without problems, but no WiFi. Ran patch-kext.sh when booted from stick. After installing patch-kext.sh, Big Sur again failed with a kp.
Error script from Terminal is attached.
 

Attachments

  • patch-kext.sh.txt
    4.4 KB · Views: 324
MacBook Air 2012, get the grey screen for a few seconds and the the error your computer restarted because of a problem. B10 with patcher 0.4.1
 
  • Like
Reactions: TimothyR734
I think I'll try B10 with patcher 0.3.2 which was working fine on beta 9. what do you think?
 
Hello guys. Any fix for my long time problem , cant have Ethernet nor wifi to work on MacBook Pro late 2011 13’ after even installing beta 9
 
When I tried to boot a macOS Big Sur patched USB Installer on a MacBook5,2 (Early 2009), I click on it, and it goes to the "prohibited" sign. Then, I took out the HDD and installed it using a MacBookPro8,1 (Late 2011), but when I put it back in, the Mac won't recognize the disk. I used barrykn's micropatcher 0.3.0 with Beta 10. Does anybody know how to fix this issue?
 
Another successful Big Sur B10 installation using the full installer package and micro patcher 0.4.1 on an iMac 2011 / WX410 / BCM943602CDP. Had the grey/gray screen when choosing German at the installer, rebooted and could continue using English.

Only the error when creating the snapshot is (still) there.

Code:
Creating new root snapshot.
Can't use last-sealed-snapshot or create-snapshot without --bootefi.

1. Possibly all users with this installation error should simply enter in terminal before rebooting and after patching (the third time I write this) if and only if using the patch-kext.sh from the booted Big Sur:

Code:
sudo bless --folder /System/Volumes/Update/mnt1/System/Library/CoreServices --bootefi --create-snapshot

2. If you are using the patch-kext.sh from the booted USB installer you have to figure out your <Volume Label> (the name of the disk you are using for the Big Sur installation) and use:

Code:
bless --folder /Volumes/<Volume Label>/System/Library/CoreServices --bootefi --create-snapshot

(Hope this will work.. case 1 has been checked three times today, case 2 was created from this error log )
 

Attachments

  • install.log.zip
    2 KB · Views: 178
Last edited:
When I tried to boot a macOS Big Sur patched USB Installer on a MacBook5,2 (Early 2009), I click on it, and it goes to the "prohibited" sign. Then, I took out the HDD and installed it using a MacBookPro8,1 (Late 2011), but when I put it back in, the Mac won't recognize the disk. I used barrykn's micropatcher 0.3.0 with Beta 10. Does anybody know how to fix this issue?
Use the latest micro patcher 0.4.1 and re-create the USB as described and follow the latest docs.
 
Another successful Big Sur B10 installation using the full installer package and micro patcher 0.4.1 on an iMac 2011 / WX410 / BCM943602CDP. Had the grey/gray screen when choosing German at the installer, rebooted and could continue using English.

Only the error when creating the snapshot is (still) there.

1. Possibly all users with this installation error should simply enter in terminal before rebooting and after patching (the third time I write this) if and only if using the patch-kext.sh from the booted Big Sur:

Code:
sudo bless --folder /System/Volumes/Update/mnt1/System/Library/CoreServices --bootefi --create-snapshot

2. If you are using the patch-kext.sh from the booted USB installer you have to figure out your <Volume Label> (the name of the disk you are using for the Big Sur installation) and use:

Code:
sudo bless --folder /Volumes/<Volume Label>/System/Library/CoreServices --bootefi --create-snapshot

(Hope this will work.. case 1 has been checked three times today, case 2 was created from this error log )

Yes, the second code worked like a charm for me in Terminal, but without the sudo.
So, from the booted USB installer, and after the wifi patch installation, I inserted this code into the terminal :
bless --folder /Volumes/<Volume Label>/System/Library/CoreServices --bootefi --create-snapshot
and I simply rebooted.
No kernel panic anymore.
Thank you so much for your help!!
 
Oh sh...., I messed up, haha lol.
I did the patch-kext.sh, that went well...I think...I didn't restart but also used zap-snapshots.sh, now I get the forbidden sign, how to recover from that, and how can I restart normally without each and every time having to hold the Option key-choose open core and then my OS SSD disk?


I'm a happy camper again.:D
What I did is creating a snapshot again, got the idea from Ausdauersportler

Instead of using his code

Code:
me@iMac ~ % sudo bless --folder /System/Volumes/Update/mnt1/System/Library/CoreServices --bootefi --create-snapshot
Password:
me@iMac ~ % sudo reboot


I Used

Code:
 bless --folder /Volumes/SSD/System/Library/CoreServices --bootefi --create-snapshot

That worked, I thought it wouldn't cause it took a while to boot into the login screen, it did and also without using opencore.

Edit: And...Wifi works.
 
Last edited:
I'm a happy camper again.:D
What I did is creating a snapshot again, got the idea from Ausdauersportler

Instead of using his code

Code:
me@iMac ~ % sudo bless --folder /System/Volumes/Update/mnt1/System/Library/CoreServices --bootefi --create-snapshot
Password:
me@iMac ~ % sudo reboot


I Used

Code:
 bless --folder /Volumes/SSD/System/Library/CoreServices --bootefi --create-snapshot

That worked, I thought it wouldn't cause it took a while to boot into the login screen, it did and also without using opencore.

Edit: And...Wifi works.
Which Mac are you on?
 
  • Like
Reactions: TimothyR734
Register on MacRumors! This sidebar will go away, and you'll see fewer ads.