Good morning!
Over the weekend I did some more tests.
MacBookAir5,1
Using OCLP 0.0.10 and creating a new config for my 2012 MacBookAir5,1 - installing it directly to my main internal SDD EFI partition, managing to boot into OCLP and from there into my existing Catalina installation (10.15.7) I prepared my adventure. On this machines FileVault was enabled, a TM backup was in place.
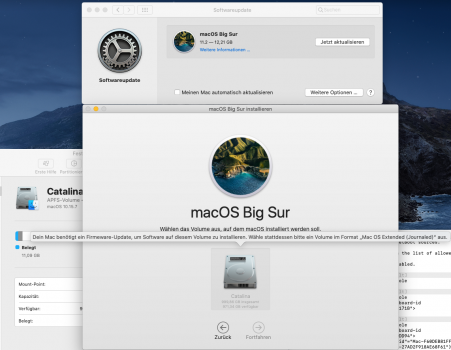
I started directly the update to Big Sur using the software update pref pane (as on a completely supported machine) and did this update to 11.2 (current full installer) and directly after the last reboot the next OTA delta update into Big Sur 11.2.1.
This was the smoothest update ever! As of now everything is working out of the box including sleep, WiFI, BT, FileVault and whatever you may miss (create a fully TM backup before you update).
iMac12,2
Most of you know that I spent some time on getting these machines supported with several patcher options. I decided to redo the first experiment with some minor differences. I started with
@dosdude1 patcher installed Catalina 10.15.7 (19H2) and used an OC config similar to
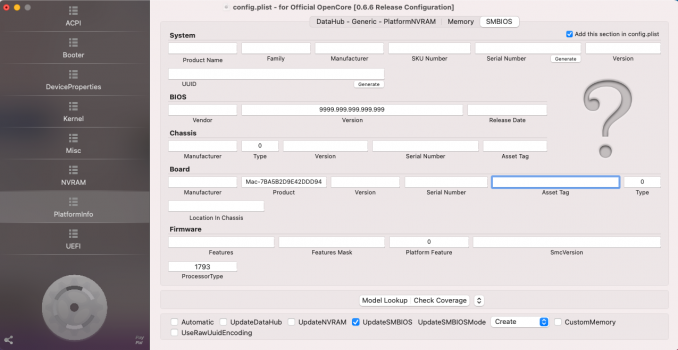
@jackluke USBOpenCore4s1 , i.e. setting only the BoardProduct within the Platforminfo->SMBIOS (
Mac-7BA5B2D9E42DDD94) section and the SystemProductName (
iMacPro1,1) in PlatformInfo->DataHub->General section and
checked additionally the new MaxBIOSVersion flag there, too. The latter SystemProductName setting was necessary to make the internal SSD accessible for the Big Sur installer in the first step starting from Catalina. The former BoardProduct only will work for later OTA upgrades within Big Sur.
Starting from Catalina I did the two steps exacly as described above: First downloading the 11.2 Big Sur installer using the software update pref pane, waiting an hour and several reboots, applying the OTA delta upgrade (2.43 GB) to 11.2.1 and got after watching a complete movie in parallel and fully installed Big Sur 11.2.1 on my iMac12,2 from 2011.
The crucial step in the middle was just
not patching the system using the micropatcher to leave the installed system volume untouched. Only that way you get offered the delta update (thanks to
@Bmju pointing this out again and
@jackluke for creating his
USBOpenCore4s1).
OCLP vs. @jackluke OC config
Why two different OpenCore configurations?
The first one generated by the OCLP makes your system completely new (i.e. new serial numbers) and it will show up within the iCloud->My devices list as new and different Mac. The second one is used by some other user groups here (
@cdf) to maintain the original identity of the Mac and offers at the same time (at least using it that way for a year now myself) no problems with iCloud login at all, too.
There is an ongoing discussion with the OpenCore developers about that change. You have to keep into your mind that OpenCore was mainly used to replace Clover on Hackintosh (Intel) systems. These systems do not offer valid system serial numbers and more and so this data has to be provided by OpenCore to disguise the PC as a normal Mac. Legacy Macs do not need such a full disguise to be recognized as a Mac system.
Summary:
Using OC you can get around the USB boot stick creation. It gives you nearly all the features during an update of a completely supported Mac. Older systems (like my iMac12,2) need real patching with the micropatcher patch-kext.sh thereafter to become fully usable (i.e. ethernet, sound, sleep in this particular case here). But such patching breaks getting OTA delta upgrades (snapshots may be our solution, here). 2012+ systems may even need no single patch and as of now it looks like OCLP is the nearly perfect way to go.
Note:
@jackluke himself advised to not use his
USBOpenCore4s1 for Big Sur upgrades any longer back in November when the first firmware accidents happened. I will follow his advice and did this by moving to OpenCore 0.6.6 release in all tests to use the MaxBIOSVersion flag as a safety belt. Additionally please download
@dosdude1 romtool app (first post) and save your firmware in advance.