I'm in big sur beta 1, what are the steps to upgrade without doing the whole beta 1 process? please.
Got a tip for us?
Let us know
Become a MacRumors Supporter for $50/year with no ads, ability to filter front page stories, and private forums.
macOS 11 Big Sur on Unsupported Macs Thread
- Thread starter dosdude1
- WikiPost WikiPost
- Start date
-
- Tags
- 10.16 macos unsupported
- Sort by reaction score
You are using an out of date browser. It may not display this or other websites correctly.
You should upgrade or use an alternative browser.
You should upgrade or use an alternative browser.
- Status
- The first post of this thread is a WikiPost and can be edited by anyone with the appropiate permissions. Your edits will be public.
I'm afraid you have to do a similar process as with beta 1, just without all of the extra fluff that got you into Big Sur. Sucks having an unsupported Mac, I know. I'm stuck with a 2011 MBP prbly until Apple Silicon gets good (if it ever does).I'm in big sur beta 1, what are the steps to upgrade without doing the whole beta 1 process? please.
and can you help us with a summary of the steps? please.I'm afraid you have to do a similar process as with beta 1, just without all of the extra fluff that got you into Big Sur. Sucks having an unsupported Mac, I know. I'm stuck with a 2011 MBP prbly until Apple Silicon gets good (if it ever does).
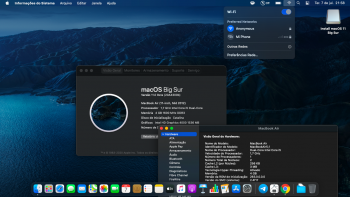
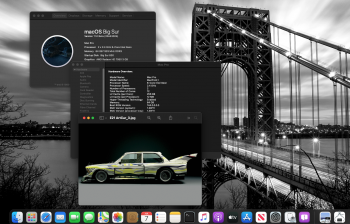
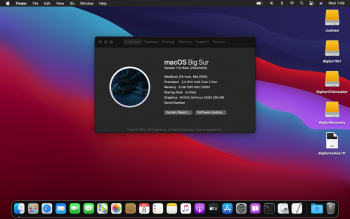
why does your about screen say iMac pro when the machine has 48gb 1333mhz ram?Just to confirm that SMBIOS spoofing via OpenCore works as expected.
View attachment 931556
I see people talking about using the OpenCore bootloader to spoof a different, supported model Mac Pro - is there any guide for how to do this on something like a late 2013 iMac? I have Big Sur Beta 2 running but considering I had to wipe the Beta 1 install to get it working, I'd like to find a better solution that can just update like normal.
The trick I found that worked on my MacPro5,1 was to spoof my SMBIOS with OpenCore from a USB to run the Installer.app from Mojave and target a second hard disk, then to remove everything but the target hard disk and let it install without OpenCore i.e. natively. As long as boot-args has -no_compat_check this works for me. I will set up open core now for some drivers I want.
Step-by-Step is working for Beta 2
You need to maintain a macOS Catalina installation on an APFS Container and continue from there.
Then you can transfer all your data to the new Big Sur Beta 2
Hi, could you show me the Step-by-step to make this??
Thanks.
@jackluke/Volumes/BigSurSystemLabel/System/Library/CoreServices/SystemVersion.plist
Will the System allow me to remove this file?
Also, once removed should I run system update is Preferences? I just don't want to go through the Beta 1 process again...
Thanks in advance.
Last edited:
I see this solution more complicated, so I opt for a clean installation of Beta 2 from USB.
Still, I have problems:
The terminal gave me another error in the first steps, when creating the installation USB. I was able to create the USB "Install macOS Big Sur Beta" but after typing:
xattr -c [...] patch_installer.sh
and then write patch_installer.sh [...] Install macOS Big Sur Beta
It returns the following error:
mv: rename / Volumes / Install macOS Big Sur Beta / Install macOS Beta.app to / Volumes / Install macOS Big Sur Beta / _Install macOS Beta.app: No such file or directory
Is a different patch_installer.sh necessary?
Also the famous failed 66 ...
mount_apfs: volume could not be mounted: Permission denied
mount: / failed with 66
I guess with a plain text editor you should simply edit "patch_installer.sh" renaming all the instances "Install macOS Beta" to "Install macOS Big Sur Beta" , because ASentientBot Hax.dylib method worked correctly, his method also fixed the apple request to download additional packages "An Internet connection is required to install macOS."
I've now tested v0.0.9 of my patcher with beta 2, and it works, as I had hoped it would. (And the HaxLib.dylib from Hax3 continues to prevent the System volume from being sealed, although it still does snapshot booting.)
Edit: Link was wrong, sorry. Although, the previous incorrect link reminds me, Apple's release notes for beta 2 are at the same URL as before, but they've been updated a little:
 developer.apple.com
Edit: Link was wrong, sorry. Although, the previous incorrect link reminds me, Apple's release notes for beta 2 are at the same URL as before, but they've been updated a little:
Apple Developer Documentation
@jackluke
Will the System allow me to remove this file?
Also, once removed should I run system update is Preferences? I just don't want to go through the Beta 1 process again...
Thanks in advance.
System Updates from System Preferences don't work on an unsupported BigSur Mac, unless you spoof the mac with opencore.
Just use the link with InstallerAssistant.pkg (it needs at least 20 GB because the pkg is 9,56 gb and then extracted to other 9,56 gb).
To remove that file (to attempt an in-place upgrade) is not easy from your current BigSur beta 1 , you should from a BigSur Installer or Recovery :
csrutil authenticated-root disable ; rebootThen from BigSur normal booting terminal:
mount
from mount locate your diskXsYsZ
sudo mkdir ~/BigSur/
sudo mount -o nobrowse -t apfs /dev/diskXsY ~/BigSur/
cd ~/BigSur/System/Library/CoreServices/
sudo rm SystemVersionCompact.plist
sudo bless --folder ~/BigSur/CoreServices/ --bootefi --create-snapshot
reboot
Last edited:
Wifi usb V2 doesˋt work anymore on my clean Bigsur B2 install.
Sure, but you better change the serial number, MLB, UUID.
If everyone use the same serial number, it may cause issues.
Also, my recommendation is that you just extract the PlatformInfo section, and inject that into your own config to perform Big Sur installation / update. Do NOT use my whole EFI folder. My config is quite customised for my own use, may not fit for your hardware.
Last but not least, there is no need to keep the SMBIOS spoofing. You can boot with the original SMBIOS once the update / installation is completed.
View attachment 931624
I know that you are an expert, as many other on the OpenCore thread, but on an EFI Mac, I'd suggest to add in config.plist this key that should block any unwanted EFI SMC firmware update:
Code:
        <key>Security</key>
        <dict>

            <key>BlacklistAppleUpdate</key>
            <true/>

</dict>cMacPro mid 2012 Big Sur beta 2 installed, WIFI is not working.
Big thanks to jackluke for InstallAssistant.pkg, and Big Sur beta 2 installation as same as beta 1.
Booting from your Catalina (or another macOS with Wifi), System Report Wifi tab, what's your Wifi device ID AirPort Extreme example (0x14E4, 0xF5) ?
Because I could provide you an easy fix for BigSur beta 2 Wifi .
Last edited:
Because I am actually using a Mac Pro 5,1 (as per my signature). iMac Pro ident is just the result of SMBIOS spoofing via OpenCore. This is the key to make Big Sur installer / update work "natively".why does your about screen say iMac pro when the machine has 48gb 1333mhz ram?
I know that you are an expert, as many other on the OpenCore thread, but on an EFI Mac, I'd suggest to add in config.plist this key that should block any unwanted EFI SMC firmware update:
[automerge]1594195380[/automerge]Code:<key>Security</key> <dict> <key>BlacklistAppleUpdate</key> <true/> </dict>
In OpenCore 0.6.0 this value is depricated.
Now they use NVRAM variable 7C436110-AB2A-4BBB-A880-FE41995C9F82:run-efi-updater
In 0.5.9 we can use this new value also. Or both.
This is the reason whyI know that you are an expert, as many other on the OpenCore thread, but on an EFI Mac, I'd suggest to add in config.plist this key that should block any unwanted EFI SMC firmware update:
[automerge]1594195380[/automerge]Code:<key>Security</key> <dict> <key>BlacklistAppleUpdate</key> <true/> </dict>
Booting from your Catalina (or another macOS with Wifi), System Report Wifi tab, what's your Wifi device ID AirPort Extreme example (0x14E4, 0xF5) ?
Because I could provide you an easy fix for BigSur beta 2 Wifi .
BlacklistAppleUpdate isn't in the 0.6 config. The run-efi-updater variable was there, but may be I accidentally removed that. Will add that back to the config, thanks for picking that up.I finally was able to create a bootable Big Sur Beta usb. I downloaded createinstallmedia app from softpedia which is made by Chris111 who makes the kext droplet at first it gave an error towards the end so I renamed install macOS Big Sur Beta.app to Install macOS Beta and the usb boots without patches on my iMac 13,1 without the patches will try and install in my morning 
@ASentientBot seems from BigSur Beta 2 with Nvidia GeForce Tesla, the WindowServer crashes continuosly after the login UI , have you noticed this behavior too ?
So I'd advise the other to keep BigSur Beta 1 if you have a legacy Nvidia non-metal GPU.
So I'd advise the other to keep BigSur Beta 1 if you have a legacy Nvidia non-metal GPU.
Could you show me the correct link to the installer of the first beta then, which I could ask to download a friend in the city, and then install in my village, where I am now only with the gprs network. I heard that Big Sur may not install from usb installer without the Internet. Thanks in advance@ASentientBot seems from BigSur Beta 2 with Nvidia GeForce Tesla, the WindowServer crashes continuosly after the login UI , have you noticed this behavior too ?
So I'd advise the other to keep BigSur Beta 1 if you have a legacy Nvidia non-metal GPU.
I have a link to dmg with an installer of 8.9Gb in size, but I see that others download 9.6Gb, probably there is also Recovery in the package. I need a full installer, I can not download Recovery through gprs during installation@ASentientBot seems from BigSur Beta 2 with Nvidia GeForce Tesla, the WindowServer crashes continuosly after the login UI , have you noticed this behavior too ?
So I'd advise the other to keep BigSur Beta 1 if you have a legacy Nvidia non-metal GPU.
@ASentientBot seems from BigSur Beta 2 with Nvidia GeForce Tesla, the WindowServer crashes continuosly after the login UI , have you noticed this behavior too ?
So I'd advise the other to keep BigSur Beta 1 if you have a legacy Nvidia non-metal GPU.
@ASentientBot I guess I figured out how to skip WindowServer crashes after a clean BigSur Beta 2 install from a non-Metal Nvidia GeForce Tesla, it's required the "Reduce Transparency" preset before booting, it is not so simple to apply from a sealed snapshot BigSur System but essentially this should work, there are many ways:
defaults write com.apple.universalaccess reduceTransparency -bool trueor pre-editing this: ~/Library/Preferences/com.apple.universalaccess.plist
(note this is a binary plist needs to convert to xml to edit or use Xcode)
Code:
<key>reduceTransparency</key>
<true/>
or (provided that "automatic login" is disabled) reducing transparency directly from BigSur loginUI lockscreen with: ⌘ cmd + ⌥ alt + F5
and I add that my prelinkedkernel beta1 fixes still work, provided that for non-Metal GPU the transparency is reduced prior to BigSur booting.
While instead the Ivy Bridge prelinkedkernel fix beta1 will work on beta2 even with transparency enabled for any Metal GPU and for any Wifi card.
edit:
I attached my already "reduced transparency" binary plist for BigSur beta 2 non-Metal GPU, from another APFS macOS the path to replace is:
diskutil list
(locate your BigSurBeta2 Data Volume)
diskutil mount diskXsY
and replace here the attached file (show hidden folders from Finder with ⌘ cmd + ⇧ shift + . ):
/Volumes/BigSurBeta2 - Data Volume/Users/username/Library/Preferences/com.apple.universalaccess.plist
Attachments
Last edited:
I would use jackluke's steps to not have to do EVERYTHING all over:and can you help us with a summary of the steps? please.
[automerge]1594200912[/automerge]
This should work, although I caution your proceeding as beta 2 is known to have multiple issues...System Updates from System Preferences don't work on an unsupported BigSur Mac, unless you spoof the mac with opencore.
Just use the link with InstallerAssistant.pkg (it needs at least 20 GB because the pkg is 9,56 gb and then extracted to other 9,56 gb).
To remove that file (to attempt an in-place upgrade) is not easy from your current BigSur beta 1 , you should from a BigSur Installer or Recovery :
csrutil authenticated-root disable ; reboot
Then from BigSur normal booting terminal:
mount
from mount locate your diskXsYsZ
sudo mkdir ~/BigSur/
sudo mount -o nobrowse -t apfs /dev/diskXsY ~/BigSur/
cd ~/YourBigSurSystemLabel/System/Library/CoreServices/
sudo rm SystemVersion.plist
sudo bless --folder ~/YourBigSurSystemLabel/System/Library/CoreServices/ --bootefi --create-snapshot
reboot
This should work, although I caution your proceeding as beta 2 is known to have multiple issues...
Just use the link with InstallerAssistant.pkg
And where the link is?
Register on MacRumors! This sidebar will go away, and you'll see fewer ads.


