Become a MacRumors Supporter for $50/year with no ads, ability to filter front page stories, and private forums.
it's working fine.
Python 3 not being present was not critical as ConfigFactory actually comes with an implementation that is used in such cases instead. The problem was that once the hardware probing failed on that item (either by using an installed or distributed Python instance), it should have degraded to using the fallback.

As noted, this fallback does not currently work in some instances and therefore, the GPU Acceleration / DRM params were not added. ConfigFactory injects these params in the DeviceProperties section but it works equally as well as boot arguments as you have added.

As the issue was with GPU Acceleration / DRM params, you might want to restore the original Board ID. That is, there was no need to change that and you only needed to add those missing params.

No longer necessary?
Adding MonteRand was borderline in the first place as it only affected an early beta and therefore subject to change. My instinct was to leave it out but decided to add it in for tinkerers. However, the item it addresses was removed in the next beta release.

It will most likely pop back in again at some point, but going with the instinct from now on and will only add such when definite. Tinkerers can always add such stuff manually in the interim.
 
Updated MyBootMgr to v075d
See change log in Post 1 for details


fallback does not currently work in some instances
Turns out to be likely to be wide spread.

MyBootMgr v075d is essentially an early release of MyBootMgr v076 and therefore includes a working pre-release version of OpenCore 0.7.6 due to breaking changes.
 
  • Like
Reactions: Farravi
Hi Dayo,

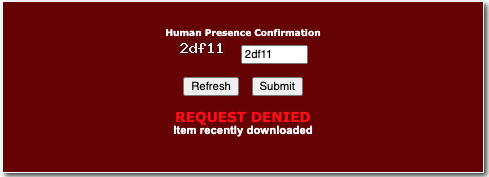
I wanted to d/l the latest iteration of the MyBootmgr ver 075d but i get this message instead : Request Denied Item recently downloaded.

The latest version i have is 075c I believe.
 

Attachments

  • Screenshot 2021-11-18 at 13.11.08.png
    Screenshot 2021-11-18 at 13.11.08.png
    17.4 KB · Views: 61
That shows up when you try to download the item more than once in the same browser session.

In plain language, you haven't shut your browser down since the last download. Until fairly recently when people decided to never shut anything down, that was a sure sign a bot/spider was at work.
 
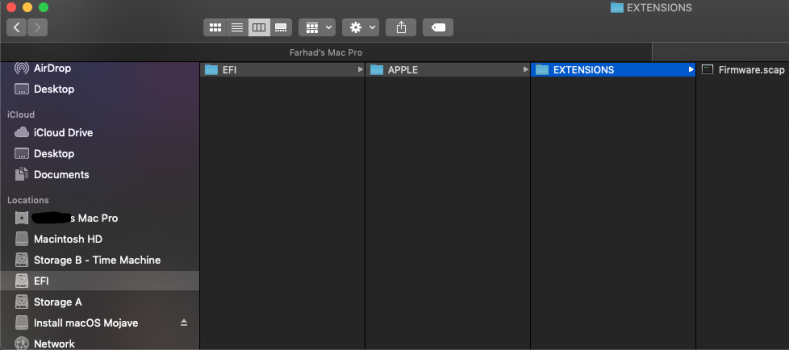
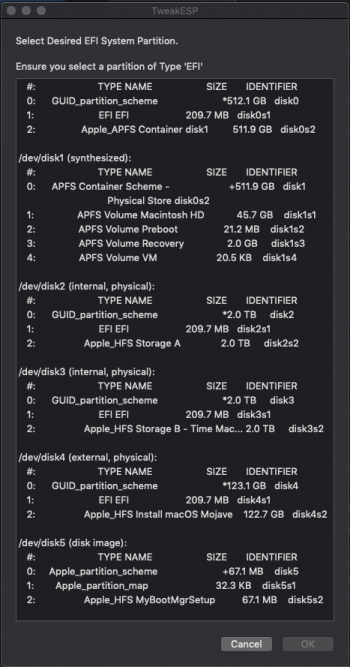
I ran TweakESP to mount any EFI folders i could find and they seem to be empty except for the EFI folder of Disk3 i.e. Storage A which has 'Firmware.scap' sitting in it (photo attached).

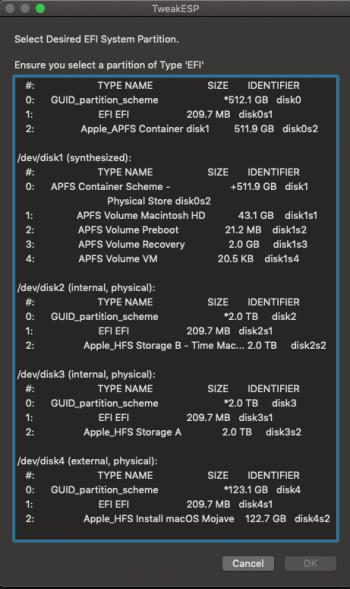
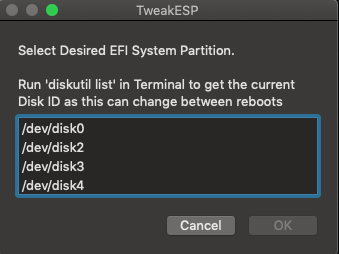
Whilst running it I encountered the following message every time i replicated this method above 'Could not validate selected item' (photo attached) but then it says 'retry' and after gives me another option Select desired EFI system partition'

I had previously done this exercise on advise on the other thread and took the decision to delete all the folders within the EFI folders i could find including 'OC' folder that was sitting on I can't recall but it was eitherStorage A or Storage B Time Machine.

I can confirm that the Bootrom version showing is 144.0.0.0.0. So what next?

Edit : I had forgotten that I had physically removed the 2 SATA drives, Storage A and Storage B Time machine and have updated my findings including the photo's accordingly.
 

Attachments

  • Screenshot 2021-11-29 at 13.03.26.png
    Screenshot 2021-11-29 at 13.03.26.png
    17.4 KB · Views: 66
  • Screenshot 2021-11-29 at 14.09.53.png
    Screenshot 2021-11-29 at 14.09.53.png
    125.4 KB · Views: 65
  • Screenshot 2021-11-29 at 14.19.42.png
    Screenshot 2021-11-29 at 14.19.42.png
    182.5 KB · Views: 53
  • Screenshot 2021-11-29 at 14.35.16.png
    Screenshot 2021-11-29 at 14.35.16.png
    25.7 KB · Views: 57
Last edited:
Since you have previously tried the OCLP, you need to clear out a sticky NVRAM variable that it configures OpenCore to set up.

This is not documented by the OCLP, but it can be a problem when it is not wanted, as it forces OpenCore to be used every time you boot with OpenCore present.

Worse thing is that you only need to boot using an OCLP generated OpenCore instance once and this sticky NVRAM variable is basically set forever .... even if you remove the OCLP instance. The next time you boot with OpenCore present, on a USB or whatever, it will override everything and be used.

You need to carry out the following steps to clear this sticky NVRAM variable:
  1. Shut down your Mac and switch the power off at the electrical socket
  2. Wait for at least 15 seconds, then switch the power back on
  3. Wait for at least 5 seconds after this then press the power button on your Mac to restart
  4. Immediately press the "OPT", "CMD", "P" and "R" keys together and hold them down until at least four (4) chimes
  5. Release the keys and your Mac OS installation will be loaded
  6. Go to System Preferences, select a Startup Disk then restart using the "Restart" button there
  7. Do the relevant MyBootMgr steps once you are back in Mac OS.
On the messages you got, there are instructions on what you need to do on each, such as to run diskutil list to check the ID of the disk you want to use, and select that in the box.

The message about not being able to validate an item is not serious since there is a button to click and which you can follow the instructions on the next screen.

BTW, that message was rephrased in v075d which suggests you may not be running that version as you should be. Check and make sure. Already on v076 so can't recollect.
 
Last edited:
  • Like
Reactions: Farravi
You need to carry out the following steps to clear this sticky NVRAM variable:
  1. Shut down your Mac and switch the power off at the electrical socket
  2. Wait for at least 15 seconds, then switch the power back on
  3. Wait for at least 5 seconds after this then press the power button on your Mac to restart
  4. Immediately press the "OPT", "CMD", "P" and "R" keys together and hold them down until at least four (4) chimes
  5. Release the keys and your Mac OS installation will be loaded
  6. Go to System Preferences, select a Startup Disk then restart using the "Restart" button there
  7. Do the relevant MyBootMgr steps once you are back in Mac OS.
I've gone through these steps methodically and executed them except for running into an issue at step 4, i only ever get 2 chimes, a very soft low one initially and a second louder one. I held the keys until i could, as it loaded me into the user login page.

After downloading 075d, i can report that the error message has been ironed out, so i was able to go through what seems like a list of volumes that shows up on disk utility and i was able to mount the volumes directly from that page successfully.

I could only find the firmware.scap this time on 2 volumes, Storage A and Storage B Time Machine. The other EFI folders on 2 other disks were empty.
 

Attachments

  • Screenshot 2021-11-29 at 22.14.00.png
    Screenshot 2021-11-29 at 22.14.00.png
    147.9 KB · Views: 59
Last edited:
That's unusual. You should be able to get other loud chimes if you keep the keys held down.
Not sure whether that outcome implies something is not right.

If you are sure you didn't lift up on one of the keys, you might want to send a PM to @tsialex and/or @Macschrauber to tell them about this and ask about checking your BootROM.
 
  • Like
Reactions: Farravi
That's unusual. You should be able to get other loud chimes if you keep the keys held down.
Not sure whether that outcome implies something is not right.

If you are sure you didn't lift up on one of the keys, you might want to send a PM to @tsialex and/or @Macschrauber to tell them about this and ask about checking your BootROM.
Any Apple wireless KB or a KB that don't support continuous NVRAM resets, several commonly used Logitech and Microsoft don't support it (even some wired ones), also can cause the @Farravi reported issue.
 
  • Like
Reactions: Farravi and Dayo
You have two options given the keyboard capability info:
  1. Get a wired keyboard, preferably an Apple one, connect it directly to your MacPro and execute the reset with this.
  2. Go ahead and run ConfigFactory and then use DeployConfig as per Post 1 to move the setup to your preferred ESP.
If you go with the second option, reboot after deploying and you will end up with one of two situations:
  • You get the RefindPlus Screen:- Means all is good and you can continue following the Post 1 instructions
  • You get an OpenCore Screen:- Means the sticky NVRAM variable is still there.
    • In this case, press the spacebar immediately and you will see a "Reset NVRAM" option.
      • Select this and you should be rebooted into RefindPlus as it will clear the the sticky NVRAM variable
      • MyBootMgr setup does not include this and running "Reset NVRAM" from OpenCore instances it creates should clear the variable
    • You can then continue with following where you left things in Post 1.
 
  • Like
Reactions: Farravi
You have two options given the keyboard capability info:
  1. Get a wired keyboard, preferably an Apple one, connect it directly to your MacPro and execute the reset with this.
@tsialex was right, I used my A1644 Magic Wireless Keyboard and it worked when I connected the Lightening to USB Cable into the Mac pro's native USB port.

I will go onto the 2nd part (ConfigFactory) and report back.

Update

I was able to successfully reboot into Refindplus (photo attached).

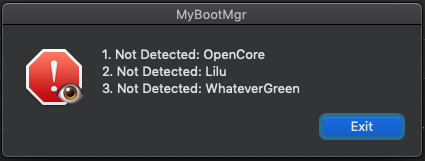
However, not so sure about OC as from the photo attached i selected the first option which led me into white screen so did the 2nd screen, the VerifyOC confirmed that OC is not installed.


2db3584620abb6bbbd5fd98578f6329e.jpg


I can also report selecting the 3rd icon boots me into Macintosh HD which has my native OS Mojave.
 

Attachments

  • Screenshot 2021-12-01 at 18.01.06.png
    Screenshot 2021-12-01 at 18.01.06.png
    24.7 KB · Views: 65
Last edited:
When you edit a post, there is no notification of this.
So, going back to edit a post a significant while after originally posting it can result in your edits not getting picked up as was the case here.

VerifyOC can only detect OC when OC is actually running.
The message did not say OC is not installed but that it was not detected (which it can be if not actually running such as when not booted via OC as in your case where you were booted via RP).

Zip the EFI folder created and attach this (Assuming you fully followed the instructions in Post 1 from beginning to end).
 
  • Like
Reactions: Farravi
The file you attached doesn't contain RP/OC and is basically empty. Since trying to see what was happening with your setup, I expected you would attach the EFI you deployed according to Post 1 and not a random empty one. Your disk names (Storage A or Z or any other name you give them) are only relevant to you.

OK, since you have had problems with following the instructions on all the various methods, I think your best bet is to maybe step back, ask someone else to follow the instructions and go for a walk or something. It should be all done by the time you get back.
 
Last edited:
Updated MyBootMgr to v076
See change log in Post 1 for details
 
  • Like
Reactions: JedNZ
Updated MyBootMgr to v076
See change log in Post 1 for details
There was a glitch in the RefindPlus REL file and the MyBootMgr package has been updated. The Debug build was not affected.

If you downloaded MyBootMgr before this message, you can either re-download and re-run things or easier perhaps, download RefindPlus package from GitHub and just replace the REL file.
 
Updated MyBootMgr to v076

@Dayo - I just downloaded the 076_MyBootMgr package, and while in the midst of selecting options in the ConfigFactory app, I encountered the following error:

/bin/sh: /Users/Shared/MyBootMgr/MyTools/ConfigFactory.app/Contents/Resources/Scripts/Helpers/CountNVME.command: No such file or directory

Upon clicking "OK" in the error dialog, the app simply quit without any further messages.

I had a look inside the app using Show Package Contents and indeed there is no file named CountNVME.command.
 
  • Like
Reactions: Dayo
I seem to have somehow lost that file ... or maybe I only created it in my mind as while I can recollect visualising it, I can't recollect actually creating it.

Just knocked something similar together and re-uploaded the package. Give it 10 mins or so for a server refresh and download again.
 
  • Like
Reactions: zzzippp
The file you attached doesn't contain RP/OC and is basically empty. Since trying to see what was happening with your setup, I expected you would attach the EFI you deployed according to Post 1 and not a random empty one. Your disk names (Storage A or Z or any other name you give them) are only relevant to you.

I think i undertand, I used TweakESP to mount the target drive containing the EFI folder(in my case Storage A).

Reason I mentioned Storage A) is that is the consistent with the theme and the chosen drive that we discussed in previous posts where the EFI folder containing the RP/IC would be instated using Mybootmgr.

The disk utility within TweakESP ask to select the desired system partition, I noticed all the EFI folders in the different volumes were 209.7mb i.e. disk0s1, disk2s1, disk3s1.

Screenshot 2021-12-07 at 20.21.34.png


There is also a EFI folder in MyBootMgr folder, is this the one I am supposedly zipping up?
\
Screenshot 2021-12-07 at 20.29.33.png

OK, since you have had problems with following the instructions on all the various methods, I think your best bet is to maybe step back, ask someone else to follow the instructions and go for a walk or something. It should be all done by the time you get back.
I have followed your instructions with Post 1 to the best of my capability. At this point, I am close to 'throwing the towel in' so to speak.

I also understand and appreciate that you have been patient with me and if you decide to not reply / respond or dedicate any further time on this I will understand.

In the meantime, Thank you once again.
 
There is also a EFI folder in MyBootMgr folder, is this the one I am supposedly zipping up?
Well, if it has not been deployed using the DeployConfig app as written in the instructions, then it is not doing anything.

The Post 1 instructions can be summarised as follows:
  1. Run ConfigFactory to create a setup
  2. Run DeployConfig app to put the setup into an ESP of your choosing
  3. Run BootBlesser to Bless the setup in that ESP
So, if you had done the second part, deployed the setup to an ESP of your choosing, you should be able to simply mount that ESP, which would contain the setup you created earlier, copy the files somewhere and zip those up.

They would be the same as those in the MyBootMgr folder but the concern is that you don't seem to know which ESP you chose to put things in or that if you do, that ESP is empty (Step 2 was not done).

I have followed your instructions with Post 1 to the best of my capability. At this point, I am close to 'throwing the towel in' so to speak.
Understand and I wasn't joking, or having a dig, when I said you might want to consider stepping back and letting someone else have a look at running it. The instructions are simple step by step stuff but we can all sometimes get into a knot on things and end up bing unable to follow such ... typically comes from jumping or second guessing stuff.

At such a time, getting someone else to have a go instead and most importantly, leaving them to it, can work wonders. They don't need to be computer gurus .. just basic computer knowledge will do.
 
  • Like
Reactions: Farravi
One thing though is that you obviously must have deployed at some point to get the RefindPlus screen.
Have you later gone and deleted the ESP files? If you have, then you need to run the process again.

You also need to note which Disk you saved in (sorry, I can't keep the names of your disks in my head)
But if you want to use the one called Storage A, then you need to select the EFI EFI line associated with that disk which would be the one directly above it.

What I would suggest at this point is to start over, hopefully for the last time.

Make sure each ESP is empty then do the 4-Chime Reset and go to POST 1 and follow the steps one after the other without skipping or changing any. Probably better to use the updated MyBootMgr (v076) as it should make deploying etc easier.
 
  • Like
Reactions: Farravi
One thing though is that you obviously must have deployed at some point to get the RefindPlus screen.
Have you later gone and deleted the ESP files? If you have, then you need to run the process again.
I thought i deployed it and actually 'hard' blessed RP. The RP screen did show up a few times. I haven't deleted any folders / files since.
But if you want to use the one called Storage A, then you need to select the EFI EFI line associated with that disk which would be the one directly above it.
That's what I did.
What I would suggest at this point is to start over, hopefully for the last time.
Yes I'll give it a go again, fingers crossed.
Make sure each ESP is empty then do the 4-Chime Reset and go to POST 1 and follow the steps one after the other without skipping or changing any. Probably better to use the updated MyBootMgr (v076) as it should make deploying etc easier.
Will do and report back with good news this time hopefully.
 
Load each ESP as before, delete the contents, do the reset and start from the top.
Use the latest version as mentioned.
 
  • Like
Reactions: Farravi
Just knocked something similar together and re-uploaded the package.
@Dayo, I downloaded the updated 076_MyBootMgr package, and after choosing all options in the ConfigFactory app and the MyBootMgr EFI directory was built, I noticed that the config.conf for RefindPlus is missing the custom menuentry stanzas corresponding to the two OpenCore instances created as part of the build. At the end of the config.conf file, I only see the sample manual configuration stanzas that are included in the original unaltered RefindPlus config.conf.

I tried running ConfigFactory again, and at the end got the same result.

Attached are the RefindPlus config.conf and DebugLog_ConfigFactory.log files in a zip archive, for your review, thanks!
 

Attachments

  • MyBootMgr076-NoCustomStanzas.zip
    20.3 KB · Views: 65
Register on MacRumors! This sidebar will go away, and you'll see fewer ads.