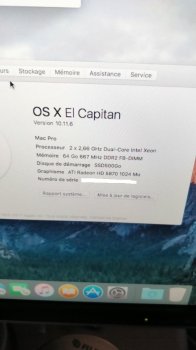
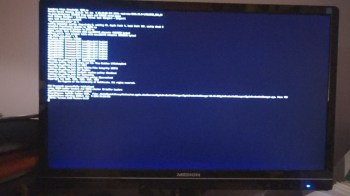
Ok. I messed up trying to pikify another macpro1.1
Inventory:
-2 macpro 1.1 one working good with Elcapitan pikified 1 year ago...the other with a new ssd that needs to get an Elcapitan pikified.
-1 Imac 27 late 2013 to work
-1 icy dock external usb case
-1 pen 16gb sandisk
This is what I've done:
1. Copy the Elcapitan Install app to a an 16Gb usb
2. Booting the working macpro 1.1 with pike's boot version
3. Attach the ssd dirve that I want to pickify with and external usb case
4. Open the elcapitan Install APP for trying to install the OS in the external ssd...and worked till I need to reboot.
5. Now I can't boot in the working macpro.
I need to restore the working macpro and pikify the other...what I must do now?
Any help would be apreciated.
Ouch.
========== edit ==========
It might be quicker to try a parameter RAM reset
Reboot MacPro 1
When you hear the chime, hold down the key combination
 ALT P R
Keep the keys held down until you hear a second chime, then release them...
That should clear any residue from the failed install, and hopefully reselect your primary internal drive/partition to boot from
=======================
Best case:
Restart the previously working MacPro.
Hold down the ALT key immediately you hear the chime
(I’m assuming your graphics card can show the boot screens)
Chose your usual startup disk.
Reboot
If you get into your usual MacOS, then open System Preferences, Startup Disk, and choose your usual partition.
If that doesn’t work:
Boot into the Recovery HD.
Hold down the ALT key immediately you hear the chime
Choose the Recovery HD
(Or hold the key combination CMD-R)
In recovery mode, you can access the Startup Disk panel (from the
 menu iirc)
Choose your usual startup disk
Restart
If that doesn’t work:
Boot into the Recovery HD.
Hold down the ALT key immediately you hear the chime
Choose the Recovery HD
(Or hold the key combination CMD-R)
You should then get access to the Terminal from the menus
Read back a few posts, I wrote about how to check and recover your main partition
Hopefully that gets you back to a working MacPro (number 1).
With the original MacPro working, and with the new SSD attached in the USB caddy...
(I’m going to reference your SSD as /Volumes/SSD if you have named it something else, amend that in the commands below)
Open a Terminal on the original Mac.
Let’s check to see if you put the installer files on the SSD
Code:
cd /Volumes/SSD
ls -alIf you can great.
If not then you need to start over.
Here’s where I think your problem probably lies....
Original MacPros sometimes struggle to boot from USB devices, such as your external drive case. Macs of the era much preferred external disks to be connected by FireWire. USB connected drives where sort of assumed to be non-writable media such as CD/DVD, or memory sticks configured to behave like CD/DVD install media. The new Pikify v14 script, and the Pikify app, build the install media onto the disk drive but not in the CD/DVD emulation style any more....
I think you probably got to the reboot phase of the install, with the SSD selected as the boot device, but it’s connected over USB.
You could try refitting the SSD to MacPro number 2, so that it is now internal.
Reboot.
Hold the ALT key when you hear the chime.
I’m hoping at this point that you can select the SSD to start up from.
It should boot into the Installer.
Proceed from there.
If you need to start over....
Do you have a FireWire cable that you can string between the two MacPros?
If you do, put the SSD back into MacPro number 2, so that it is now internal.
Connect the FireWire cable between the two MacsPros
Have MacPro 1 booted and logged in
Reboot MacPro 2 into Target Disk Mode, after a few seconds the internal disks of MacPro 2 should mount onto the desktop of MacPro 1.
Run the pikify v14 script, or the new Pikify App....
If you don’t have a FireWire cable, fit the SSD to an internal drive bay of MacPro 1, proceed from there...
Last edited:


