Become a MacRumors Supporter for $50/year with no ads, ability to filter front page stories, and private forums.
Status
The first post of this thread is a WikiPost and can be edited by anyone with the appropiate permissions. Your edits will be public.

jackluke

macrumors 68040
Jun 15, 2018
3,321
8,068
Okay, get the point 😉
But I think you could also mount the ramdisk as rw from Single user mode and then get somehow a similar behavior after typing exit. Because then the recovery disk is also allowed to write, as it would with a „extracted to disk“ dmg

The fact is that many experts here have no interest to support booting the BigSur BaseSystem.dmg from a non-APFS or legacy USB Mac.

But ASentientBot Hax3.dylib (or HaxLib.dylib) already allows to install it from an "APFS macOS" desktop directly on a non-APFS mac on internal SATA disk (sealed snapshot volume), then adding the LegacyUSBInjector.kext (and telemetrap.kext) to the kextcache it is even bootable from an external USB BigSur installation.

For "csrutil authenticated-root disable" on a non-APFS mac you can use this method: https://forums.macrumors.com/thread...unsupported-macs-thread.2242172/post-28654818
 

testheit

macrumors member
Jun 8, 2018
70
170
The fact is that many experts here have no interest to support booting the BigSur BaseSystem.dmg from a non-APFS or legacy USB Mac.

But ASentientBot Hax3.dylib (or HaxLib.dylib) already allows to install it from an "APFS macOS" desktop directly on a non-APFS mac on internal SATA disk (sealed snapshot volume), then adding the LegacyUSBInjector.kext (and telemetrap.kext) to the kextcache it is even bootable from an external USB BigSur installation.

For "csrutil authenticated-root disable" on a non-APFS mac you can use this method: https://forums.macrumors.com/thread...unsupported-macs-thread.2242172/post-28654818
The installation was not a big problem at all. BS runs on my MPB5,1 with Audio, WiFi...
It‘s only the BaseSystem that would not boot. I think it would make some steps much easier. Especially for experimenting with snapshots and co.
 

jhowarth

macrumors 65816
Jan 13, 2017
1,122
1,500
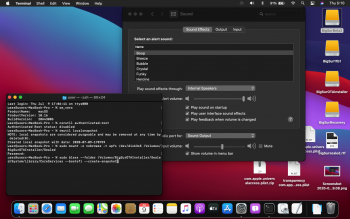
Sorry for the bad image but I don't get an error with mount_tmpfs ...

View attachment 932149
[automerge]1594292091[/automerge]

We could also use the .kc file, my experiences are also better with these. But that should also be possible, if we fix the kexts as described above. We could use kmutil and point it to the path with the fixed kexts. At the moment the .kc gets broken if we use the "unfixed" /S*/L*/E* folder as the kexts don't include any binary

In my experiments with trying to rebuild prelinkedkernels under snapshots using chroot, I have found that you can create ones which boot fine coming out of safe mode with exit but don't work correctly when booted normally. Have you tested booting .kc without going through safe mode first?
 
  • Like
Reactions: TimothyR734

jackluke

macrumors 68040
Jun 15, 2018
3,321
8,068
The installation was not a big problem at all. BS runs on my MPB5,1 with Audio, WiFi...
It‘s only the BaseSystem that would not boot. I think it would make some steps much easier. Especially for experimenting with snapshots and co.

Do you used Hax3.dylib (HaxLib.dylib) ? After install can you use "sudo mount -uw /" ?

Because on a non-APFS Mac after used for a BigSur beta2 install I have a sealed snapshot volume, and as you know deleting snapshots from a non-APFS (or legacy usb) Mac is very hard.
 

jackluke

macrumors 68040
Jun 15, 2018
3,321
8,068
@hvds , @Alex-Microsmeta , @quaccOS and others who used my prelinkedkernel fix for Ethernet, Wifi (and legacy usb and telemetry plugin), since I recently on "BigSur beta2" encountered the sealed snapshot booting and got also prohibitory symbol on sound icon, I found an enough easy way to fix the Sound (internal speakers) and Mic .

For mount non-snapshot system and creating a new snapshot from BigSur credit to a twitter user Damien.

After installed "BigSur beta2" I noticed that I can't even rename my Volume Label, but I also renamed it through the mentioned method, instead the Preboot Volume is writable as also the BigSur Data Volume.

First requirement is this: nvram csr-active-config w%08%00%00 (or w%09%00%00 )
that is: "csrutil authenticated-root disable"

then in a similar way, as already wrote also from others, from a BigSur normal booting terminal:

sudo mkdir ~/Snapshot/

(this makes an empty folder mount point on your home folder so copy exactly as written)

mount

(on the first output "mount" line you can notice a diskXsYsZ you have to consider only diskXsY)

sudo mount -o nobrowse -t apfs /dev/diskXsY ~/Snapshot/

open ~/Snapshot/


(from Finder you can now rename your Volume Label, note from Finder the mount point has your BigSurLabel while from terminal it has the "Snapshot" folder name so the folder name must be used from BigSur terminal)

from Finder browse this:

System/Library/UserEventPlugins/com.apple.telemetry.plugin

(remove the com.apple.telemetry.plugin)

System/Library/Extensions/

(replace AppleHDA.kext with this attached: HighSierra AppleHDA.kext.zip)

(replace IO80211Family.kext with this attached: IO80211Family.kext.zip)

sudo chown -R 0:0 ~/Snapshot/System/Library/Extensions/

sudo chmod -R 755 ~/Snapshot/System/Library/Extensions/

sudo bless --folder ~/Snapshot/System/Library/CoreServices/ --create-snapshot

tmutil listlocalsnapshots /


(check that the listed snapshot has the current date time or a com.apple-UUID)


Without rebuild any kextcache or kmutil at next reboot Sound internal speakers and Mic should work.

For Wifi just do a logout, and login again and it should work.
 

Attachments

  • prelinkedkernel fix sealed snapshot.png
    prelinkedkernel fix sealed snapshot.png
    685.4 KB · Views: 628
Last edited:

jowaju

macrumors 6502
Mar 7, 2019
251
333
My SSD is greyed out, I know I read it somewhere, not going to go over 1724 posts to look for the solution.

Can someone point me to the page or solution.

Cheers

Installed the 1st beta without the above greyed out SSD.

Boot to any macOS recovery 10.11 or newer and type csrutil disable, then type reboot and go back to the place where your SSD was greyed out, it should be visible now.
 

rumormiller

macrumors regular
Aug 27, 2017
120
128
Just installed Big Sur Beta 2 using the same method as I used for Beta 1 on my iMac Late 2013. Only change I made was instead of installing to my internal Fusion Drive I installed Big Sur to a 128GB SSD drive connected via USB 3 because BS was running slowly on the internal drive as if it couldn't use the SSD part of the Fusion Drive. I'm happy to report running Big Sur on the external SSD it's fast! I formatted the external SSD in Disk Utility as HFS and Big Sur installer converted it automatically to APFS.

Screenshot 2020-07-09 at 16.29.33.png


Here are the steps I used to get the beta installed on a 2013 27 inch iMac


1. Download beta 2 pkg http://swcdn.apple.com/content/down...xje070in5dorjoovnmw61x03/InstallAssistant.pkg

I'd already done steps 2-6 for the previous beta. If this is your first time you'll have to carry them out.

2. Download https://forums.macrumors.com/attachments/really-simple-installer-hack-zip.926156/


3. Copy hax.dylib to home folder


4. Boot into recovery


5. Run csrutil disable in Terminal


6. Also run this command in the terminal in recovery: nvram boot-args="-no_compat_check"


7. Reboot and run this in Terminal while on current OS


sudo defaults write /Library/Preferences/com.apple.security.libraryvalidation.plist DisableLibraryValidation -bool true


8. Run this in terminal


launchctl setenv DYLD_INSERT_LIBRARIES $PWD/Hax.dylib


BIErrorDomain error 3


"BIErrorDomain 3" is the new installer (written in Objective-C and part of an InstallAssistant internal framework, rather than JavaScript in OSInstall.mpkg/Distribution as previously) check's way of saying that the system is unsupported. In the context of my (rather ridiculously named) Hax.dylib, it means that didn't get injected into the relevant InstallAssistant daemon for some reason (probably Library Validation is enabled).


If you then reboot without running the installer you will have run the previous command again before trying the installer.


9. Run the InstallAssistant.pkg and then run /Applications/Install macOS Beta.app


Choose the destination for Big Sur. Select show all disks.


Screenshot 2020-07-09 at 15.21.16.jpg


Screenshot 2020-07-09 at 15.22.18.jpg


10. Wait for install to finish


Enable HiDPI Mode

sudo defaults write /Library/Preferences/com.apple.windowserver.plist DisplayResolutionEnabled -bool true


Restart.

Then use Retina Display Manager to get resolutions like 1280x720 HiDPi.
 

testheit

macrumors member
Jun 8, 2018
70
170
Do you used Hax3.dylib (HaxLib.dylib) ? After install can you use "sudo mount -uw /" ?

Because on a non-APFS Mac after used for a BigSur beta2 install I have a sealed snapshot volume, and as you know deleting snapshots from a non-APFS (or legacy usb) Mac is very hard.
I used the very first Hax patch with a custom patch for APFS check and later on the second installation (after the first one becomes unusable after some tests) the hax3 patch.

The volume isn‘t sealed but snapshots are enabled. So it’s quiet a pain to try modifications especially undo them if they went wrong. Applying modifications is no problem. Just creat a new bootable snapshot with the bless command.
 
  • Like
Reactions: hvds and webg3

TimothyR734

macrumors 68030
Apr 10, 2018
2,723
2,753
Logsden Oregon
I am.

Will try again tomorrow. Getting tired now. Thank you.
you can try sudo /Applications/Install\ macOS\ Big\ Sur\ Beta.app/Contents/Resources/createinstallmedia --volume, then download this https://github.com/barrykn/big-sur-micropatcher after your created the Big Sur usb drag the micro patcher.sh in the terminal then drag your Big Sur usb into the terminal and hit enter
 

maxsp97

macrumors regular
Jul 23, 2019
112
189
Some where in LA
Yes, I did that.
Additional information: Mac Pro 5,1 (2012) running Catalina 10.15.5.

Here are the steps I did for my cMacPro mid 2012, and only WIFI is not working.


Note: Other SSD format as APFS and label as BigSur OS or whatever you like.

1. Download InstallAssistant.pkg from:
http://swcdn.apple.com/content/down...xje070in5dorjoovnmw61x03/InstallAssistant.pkg
The container is 9.56 GB.
Credit to jackluke https://forums.macrumors.com/thread...d.2242172/page-64?post=28649854#post-28649854
2. Download https://forums.macrumors.com/attachments/really-simple-installer-hack-zip.926156/
3. Unzip and copy hax.dylib to home folder (shift + command + H)
If you SIP disabled then skip step 4-5.
4. Boot into recovery ( CMD + R ) on start up chimes
5. Run csrutil disable in Terminal , Then type reboot in terminal
6. Open Terminal copy this in Terminal as below:
sudo defaults write /Library/Preferences/com.apple.security.libraryvalidation.plist DisableLibraryValidation -bool true
Then < press return >, your password will be required.
7. Run this in Terminal as below:
launchctl setenv DYLD_INSERT_LIBRARIES $PWD/Hax.dylib
Then < press return >
8. Run this in Terminal as below:
sudo nvram boot-args="-no_compat_check"
Then < press return >
9. Install <InstallAssistant.pkg>
10. Open Applications folder double click the <Install macOS Big Sur Beta.app> and select drive to install.
11. Now wait for install to finish.
 

goldunseen

macrumors newbie
Jul 9, 2020
3
2
Hi all,

I need some help with my iMac 7,1 2007 24” P9300. Before upgrading to Catalina, I had some issues where it would only boot in safe mode. I have tried everything, from a disk utility repair, to a fresh macOS install, to repatching my system, to a NVRAM and SMC reset. I was thinking since upgrading to APFS and a new boot efi, that it may fix the issue. But that doesn’t seem to be the case. I’ve only upgraded because the version of iTunes on Mojave is old and cannot sync iOS 13.4.1 devices. But now in Catalina safe mode, I am not even able to connect a device or charge one. I believe this has something to do with safe Mode, but it was working before in Mojave for syncing devices, so I’m not sure. Please help me to get this system booting up normally. Thank you in advance!!
 
  • Like
Reactions: TimothyR734

kral84

macrumors regular
Jun 26, 2018
178
101
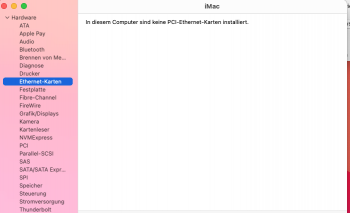
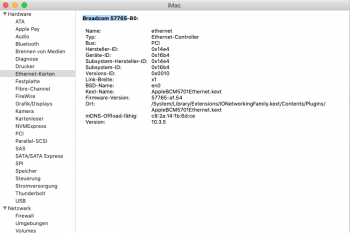
hmm..i found an terrible bug on my imac 2011:

I found a very bad bug. as soon as I upload something the network crashes. I can also upload nothing to my NAS ... you always have to unplug the network cable and plug it in so that it works again ... it just freezes :( can someone check the kext file? thanks :) i use opencore mode...installed with @Barry K. Nathan "patcher"

must i remove the com.apple.telemetry.plugin ? and how...

pic 1 : Big Sur
Pic 2 : Catalina. it that the problem?
 

Attachments

  • Bildschirmfoto 2020-07-09 um 19.26.37.png
    Bildschirmfoto 2020-07-09 um 19.26.37.png
    54.7 KB · Views: 182
  • Bildschirmfoto 2020-07-09 um 19.32.08.png
    Bildschirmfoto 2020-07-09 um 19.32.08.png
    72.6 KB · Views: 161
Last edited:

Alex-Microsmeta

macrumors 6502
Jul 14, 2018
376
630
Rome
Great work in using the "LegacyUSBInjector" with kmutil for a BootKernelExtensions.kc (or KernelCollections), with the MacBook6,1 since it has an Nvidia GeForce Tesla, could you try to add framebuffer video (as you done for IntelHD3000) to your patcher ?

While about your patched IOUSBHostFamily.kext , I have some clues how to attempt to make an USB BigSur Installer with legacy USB (or non-APFS mac), you should override (or instead its BaseSystem's Preboot) the /Volumes/USBInstallerBigSur/Library/Preferences/SystemConfiguration/com.apple.Boot.plist as for example with this:
XML:
<?xml version="1.0" encoding="UTF-8"?>
<!DOCTYPE plist PUBLIC "-//Apple//DTD PLIST 1.0//EN" "http://www.apple.com/DTDs/PropertyList-1.0.dtd">
<plist version="1.0">
<dict>
    <key>Kernel Cache</key>
    <string>System\Library\KernelCollections\BootKernelExtensions.kc</string>
    <key>Kernel Flags</key>
    <string>root-dmg=file:///BaseSystem/BaseSystem.dmg -no_compat_check cs_enforcement_disable=1 cs_debug=1 amfi_allow_any_signature=1 amfi_get_out_of_my_way=1</string>
</dict>
</plist>
then copy yours patched in /Volumes/USBInstallerBigSur/System/Library/KernelCollections/BootKernelExtensions.kc
(keep a backup of it, current size is 66,7 MB, while the patched one is 75 MB or more)

and also copy in /Volumes/USBInstallerBigSur/System/Library/CoreServices/boot.efi

the ASentientBot BigSur patched boot.efi : https://forums.macrumors.com/thread...unsupported-macs-thread.2242172/post-28604525

edit:
Note: for more matching you might replace also BootKernelExtensions.kc and boot.efi on the BaseSystem.dmg's Preboot , apple assigned to it this unique common UUID: 3CA070CB-E179-47AF-BF9C-CB668ABD57CE

If you need to add to the BigSur BaseSystem.dmg the "patched IOUSBHostFamily.kext" for matching (mach-o UUID) to its SLE folder, you could use this method: https://forums.macrumors.com/thread...unsupported-macs-thread.2242172/post-28626835

I already tested and worked for APFS HighSierra Mac with recent IOUSB (I attach two funny pictures of a patched BigSur BaseSystem.dmg), while from my attempt to use it on non-APFS Mac (legacy USB) it stuck on "IOConsoleUsers: gIOScreenLockState" verbose message or IO80211Family loaded driver.

My "prelinkedkernel fix" doesn't worked for an USB BigSur Installer (or Recovery).
This forum Is an incredibile hacking school, thank you 🤓
Boot to any macOS recovery 10.11 or newer and type csrutil disable, then type reboot and go back to the place where your SSD was greyed out, it should be visible now.

Thank you!
PS: I have problems sending commands from Recovery ..Example: when I send "csrutil disable" it says that it cannot be processed because I'm non in Recovery (false, but it boots only using opencoreloader3) , so I hope that with this method I'll also be able to disable Spotlight and spindump process that are using all the power of my weak dual core CPU... :)
 
Last edited:

LuisN

macrumors 6502a
Mar 30, 2013
737
688
Torres Vedras, Portugal
Hi, the model number is A1278, is this the same as yours? Non-retina...
Nope. Only fits in retina models. I have a mid 2012 non retina and the form factor is different.
This is your wifi card.
s-l300.jpg
AFAIK there's no AC compatible cards with this form factor. Don't know if it exists an adapter or something. The only way is patching with an earlier macOS kext
 

slears

macrumors regular
Apr 21, 2015
109
50
Warrington,UK
Nope. Only fits in retina models. I have a mid 2012 non retina and the form factor is different.
This is your wifi card.
View attachment 932248
AFAIK there's no AC compatible cards with this form factor. Don't know if it exists an adapter or something. The only way is patching with an earlier macOS kext
Darn it, usually the case. Any idea where I can get some guidance on patching to enable handoff etc? Thanks for your help so far too.
 
  • Like
Reactions: TimothyR734

0423MAC

macrumors 6502
Jun 30, 2020
497
640
Darn it, usually the case. Any idea where I can get some guidance on patching to enable handoff etc? Thanks for your help so far too.
Patching and OS support is yet to be determined with Big Sur, but keep an eye on this thread as work is being done to get these Macs up to date in terms of WiFi technology. Adapter + Card is due towards the end of this month and grabbing 2 of them myself.


jmbZ

macrumors newbie
Jun 23, 2020
29
35
Well the public beta is released, anyone know that the patcher or the hax thing will work on public beta?
 
  • Like
Reactions: Maclinux

gosvamih

macrumors member
Mar 20, 2019
58
108
Russia
I managed to put the second Big Sur beta on a MacBook6,1 - using OpenCore 0.6.0 latest.
This allowed me to make board-id spoofing in iMac14.4 and immediately get all working USB via legacy kext, which I made by hackintool. And I also used telemetrap kext - I did not have to remove the telemetry plugin.
I made a usb flash drive Installer by the command in the terminal without applying any patches to it after that.
But here the first difficulty happened - I received such an error:
Снимок экрана 2020-07-09 в 22.48.32.png


Then I copied the contents of the Installer flash drive with hidden files to the HFS partition of the SATA SSD and the installation went from there and completed successfully.
At the end of the installation, I opened the migration assistant, and transferred all the settings and files from Catalina TM backup to new installed system.

IMG_0278.JPG
123.jpeg


I want to express my great appreciation to everyone who helps people here to solve problems.

And many thanks to jackluke for his tip on how to reduce transparency by editing ~/Library/Preferences/com.apple.universalaccess.plist. CMD + ALT + F5 on the login screen did not have an effect, I could not log in, but editing from Catalina ~/Library/Preferences/com.apple.universalaccess.plist made it possible to login.

44.png


If I had a mac with metal support, I could now get a working system right away thanks to OpenCore. But I still have to replace IO80211Family.kext to turn on WiFi, and so far I can only use the system in VESA. But I can already slowly study the work of the new system.

My EFI folder with which I installed the system in the attachment. The -lilubetaall argument and two AirPortBrcmFixup.kext and BT4LEContinuityFixup.kext were absent during installation, they will be needed after the getting working WiFi (maybe)
 

Attachments

  • OpenCore_Spoof_to_iMac14_EFI.zip
    1 MB · Views: 129
Register on MacRumors! This sidebar will go away, and you'll see fewer ads.